Building a CyberSecurity Home Lab with Proxmox: Part 4 - Cyber Sandbox Setup
A Guide on Building a Cybersecurity Home Lab using Proxmox
Banner Background by AndreaCharlesta
Happy New Year! Welcome back to Part 4 in the 2025! In this part, we are going to set up Metasploitable2 and Damn Vulnerable Web Application. Metasploitable2 is an intentionally vulnerable VM that comes in the format of .vmdk (Virtual Machine Disk Image). Proxmox supports .vmdk however it works best when using proxmox’s native format which is .qcow2 to which we can easily convert. Let’s get started!
DHCP and VLAN Configuration
Before we dive in, I realized I made a mistake in my previous part with the VLAN interface and we forgot to enable DHCP for each VLAN as well. Rather than going back and changing it, I decided to address it here in the next part.
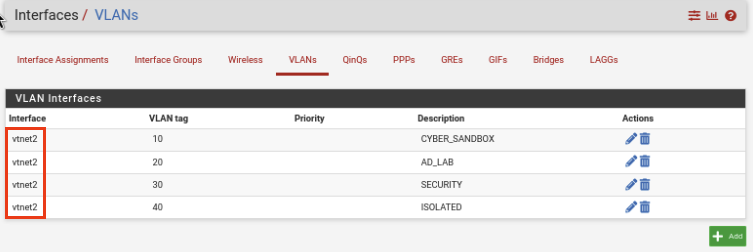
Navigate over to Interfaces -> Assignments -> VLANs (Tab). Once here we will need to change our interface from vtnet1 to vtnet2. This can be done by clicking the Pencil icon by each interface. It should match mine below.
CYBER_SANDBOX
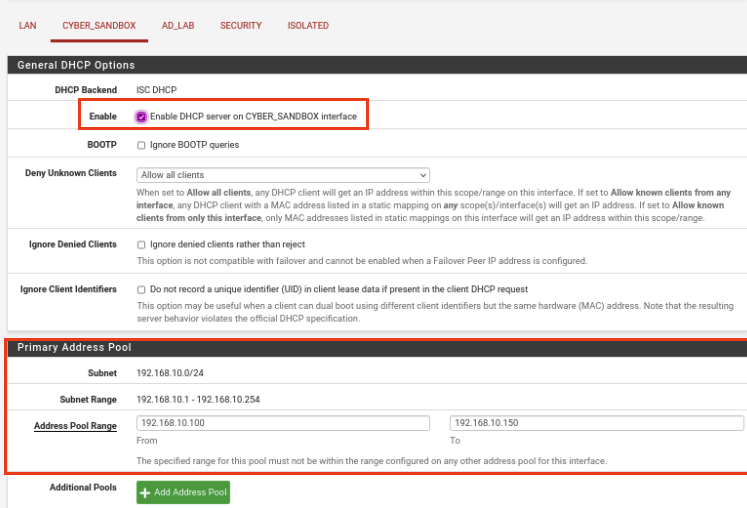
Navigate over to Services -> DHCP Server. Select CYBER_SANDBOX and change the following:
Enable: Check the Box
Address Pool Range: 192.168.10.100 192.168.10.150
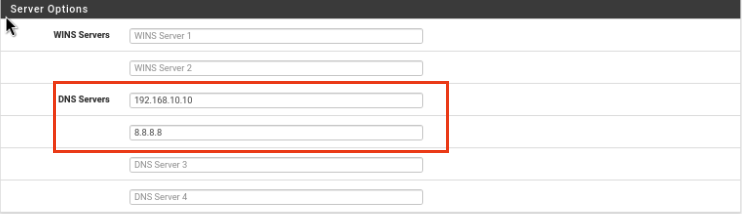
DNS Servers: 192.168.10.10 8.8.8.8
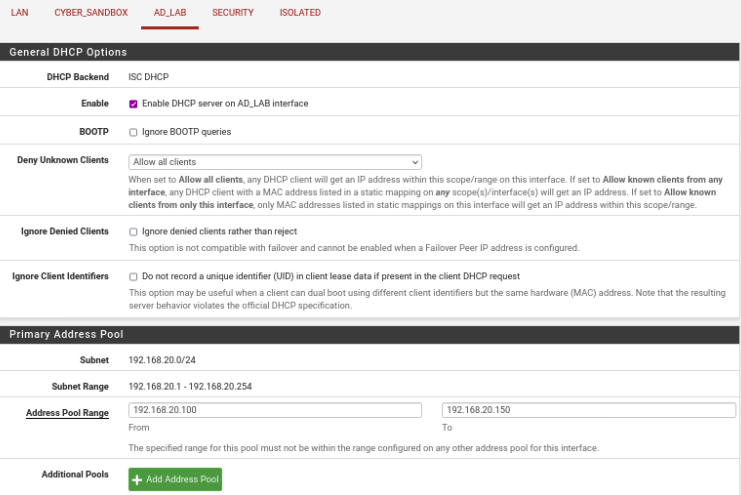
AD_LAB
Enable: Check the Box
Address Pool Range: 192.168.20.100 192.168.20.150
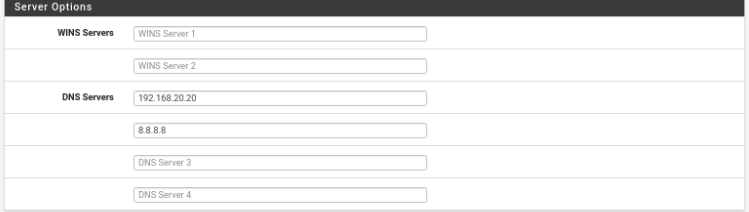
DNS Servers: 192.168.20.20 8.8.8.8
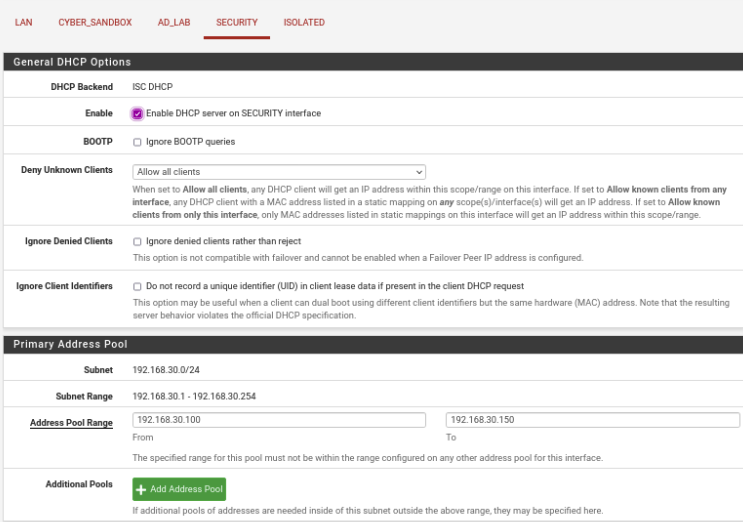
SECURITY
Enable: Check the Box
Address Pool Range: 192.168.30.100 192.168.30.150
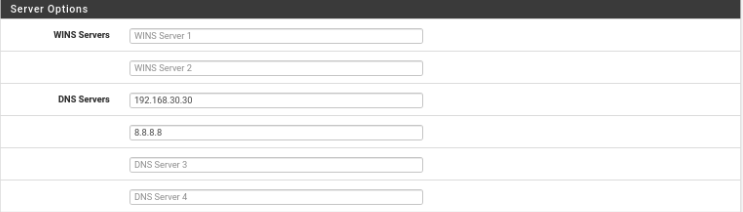
DNS Servers: 192.168.30.30 8.8.8.8
ISOLATED
This interface we will leave off. If you remember in the last part we set a firewall rule to block all traffic to and from the machine.
Metasploitable2 Setup
Downloading Metasploitable2
Download URL: Metasploitable:2-VulnHub
Make sure to download the Download(Mirror):

You may have noticed this is a .zip file and because of that setting up this VM will be different. Inside the zip files we will have folder that contains multiple VM formats. The one we are using is .vmdk and will be converting it to .qcow2. The process of setting up the VM is different so follow along and if you have any questions send them in the comment section below.
VM Creation
Lets create a VM by clicking Create VM. Give it a name. 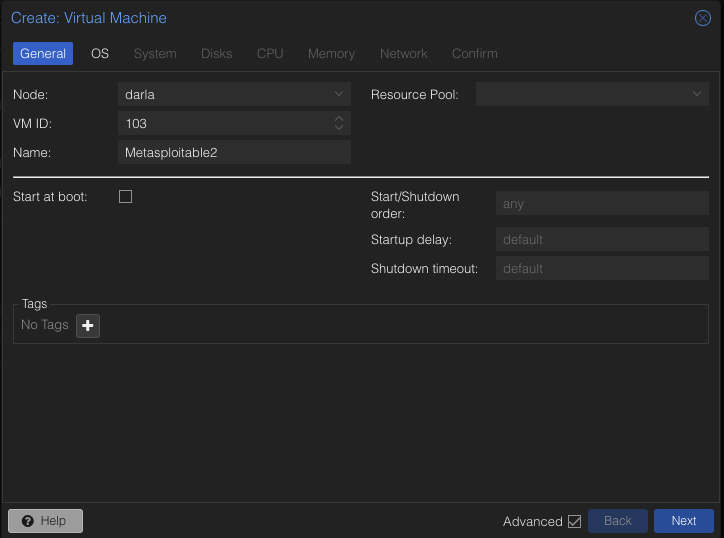
For the OS, select Do not user any media
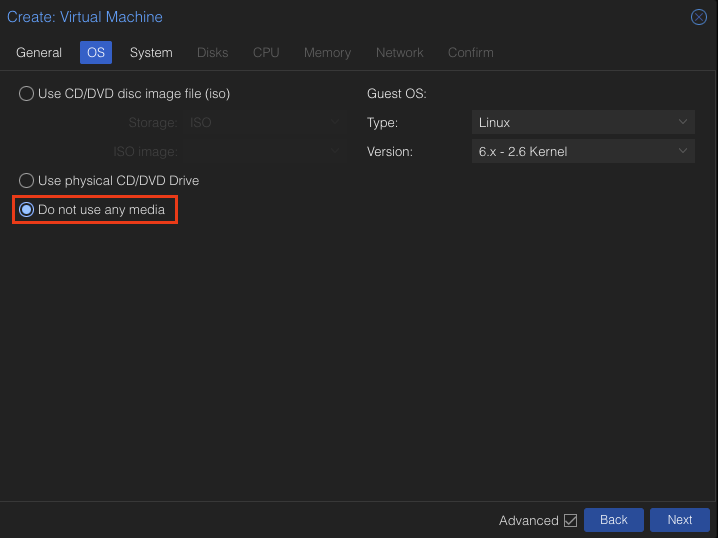
Click Next
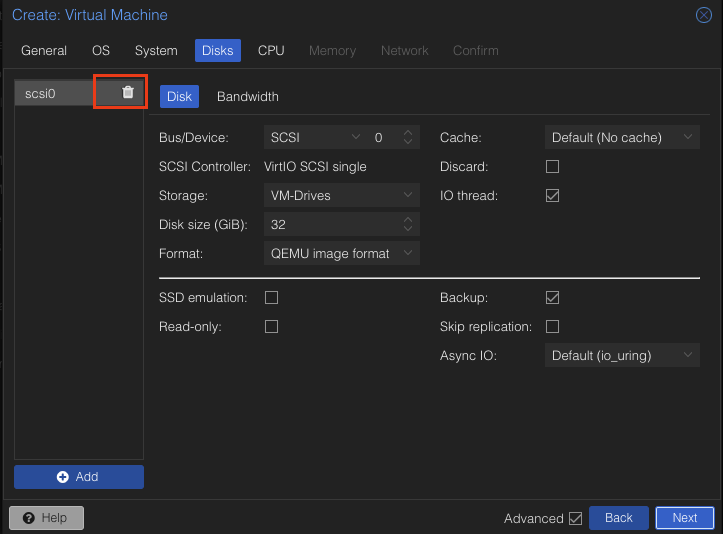
On the Disks Tab, delete scsci0. The VM will already have the disk so we do not need another one.
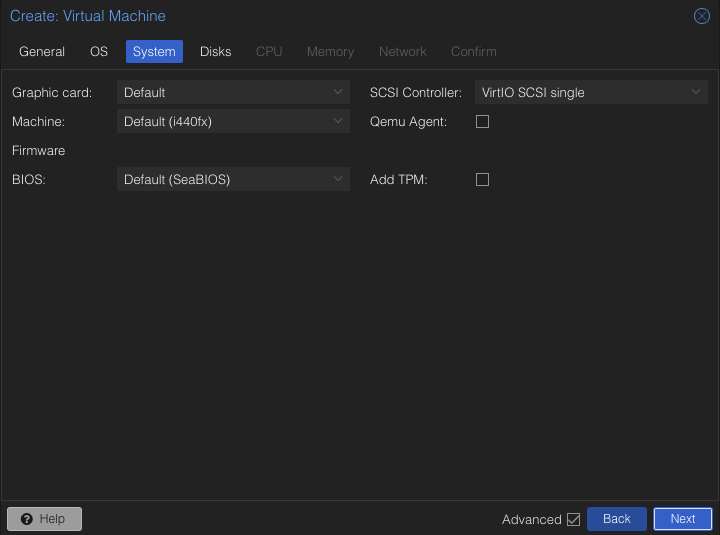
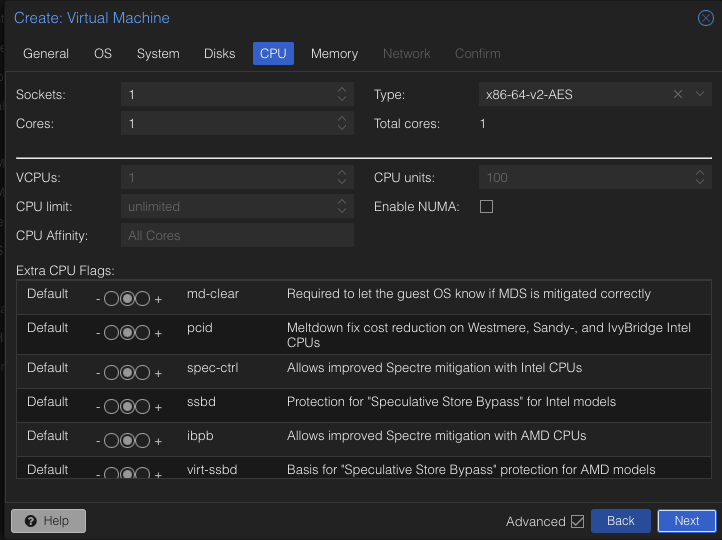
Leave everything Default. Click Next.
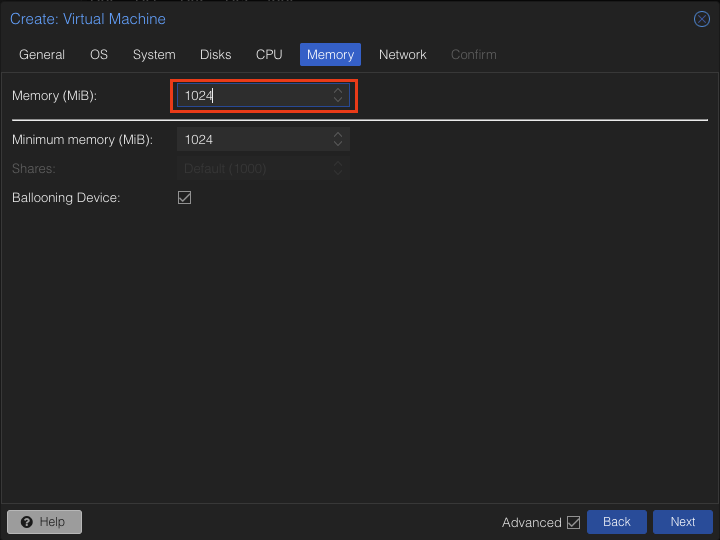
Assign in 1024 MiB of memory and click Next.
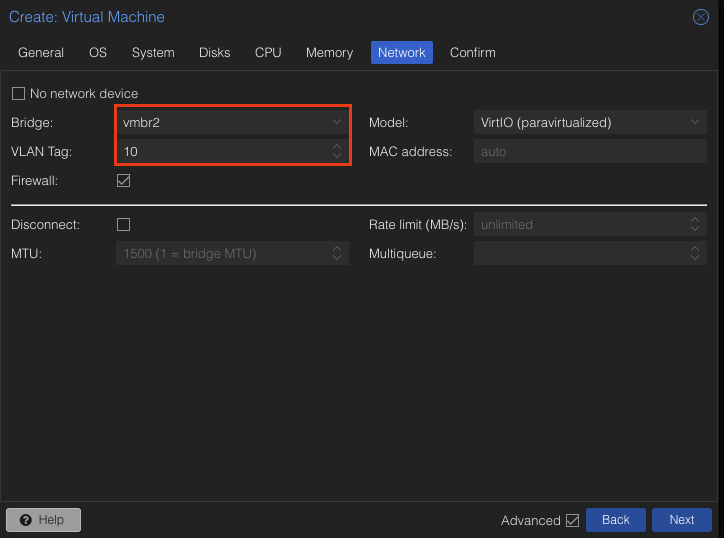
Assign it vmbr2 which is our VLAN interface. Our VLAN Tag is 10. Hit Next.
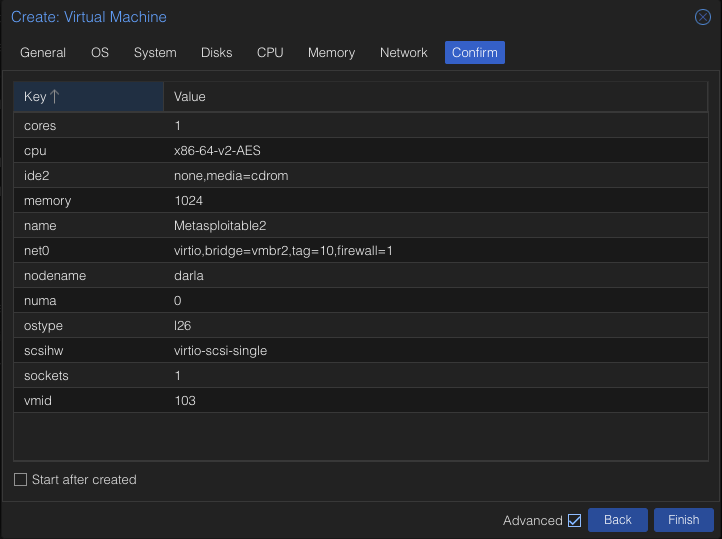
Verify everything looks right and click Finish.
Setting up Metasploitable2
Now we can start downloading and set up the Metasploitable2 VM.
Navigate to your Node and access the Shell. In my case this is Darla.
 We are going to navigate to a folder.
1
2
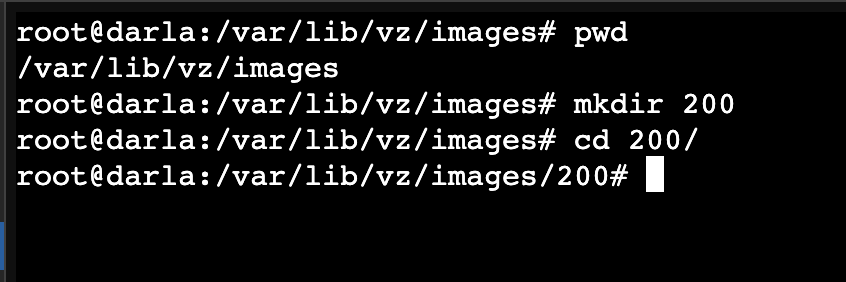
cd /var/lib/vz/images
We will create a folder corresponding to the ID of our Metasploitable2 VM. In my case it is 200.
1
2
mkdir 200
Change directory to the folder we created.
1
2
cd 200
After running the commands, your working directory should be like mine below:
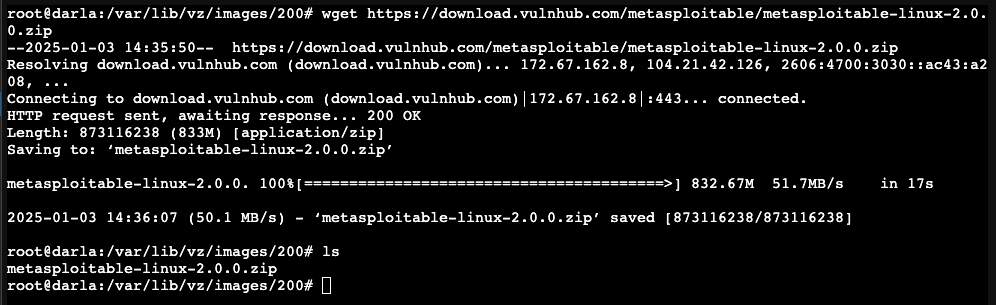
While inside the 200 folder, we are going to download the zip file straight from the source with the commands:
1
wget https://download.vulnhub.com/metasploitable/metasploitable-linux-2.0.0.zip
Let it download and run ls to see the file. It should be metasploitable-linux-2.0.0.zip.
Run the following command:
1
apt install unzip
Unzip the file by running:
1
unzip metasploitable-linux-2.0.0.zip
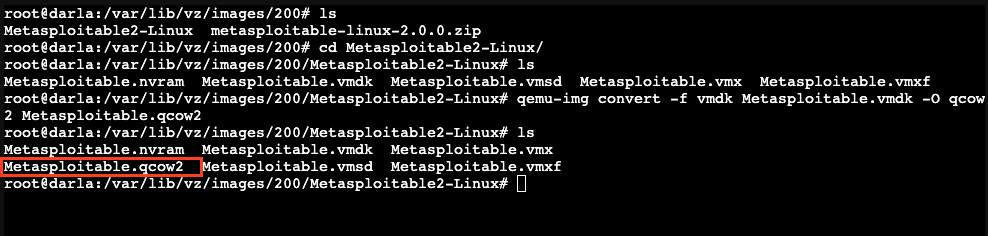
Then do ls to view the extracted folder. Let’s cd into the folder. The file with .vmdk is our target file. 
Now, we will convert it into .qcow2 using the following:
1
qemu-img convert -f vmdk Metasploitable.vmdk -O qcow2 Metasploitable.qcow2
Now that we have the VM file converted to .qcow2. We will move it to the location of our empty VM. In my case, I will move it to the /zPool/vm-drives/images/200. This will be different for you, so you will need to find out where your VMs are stored by doing ls on the /.
1
mv Metasploitable.qcow2 /zPool/vm-drives/images/200
Now, that we have the VM file in the right spot. We are going to the edit the config file.
1
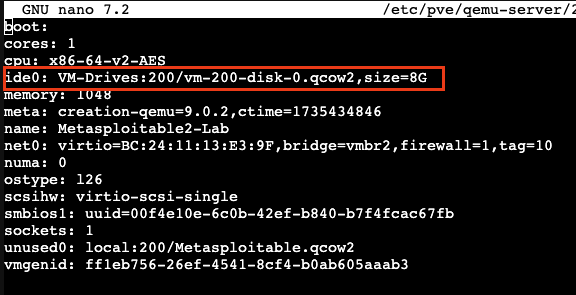
nano /etc/pve/qemu-server/200.conf
We will add the following line into the conf file using nano:
ide0: VM-Drives:200/Metasploitable2.qcow2, size=8G
What I have entered below is different but it works the same. You just have to make sure you remember where the .qcow2 file is and point it to the correct location.
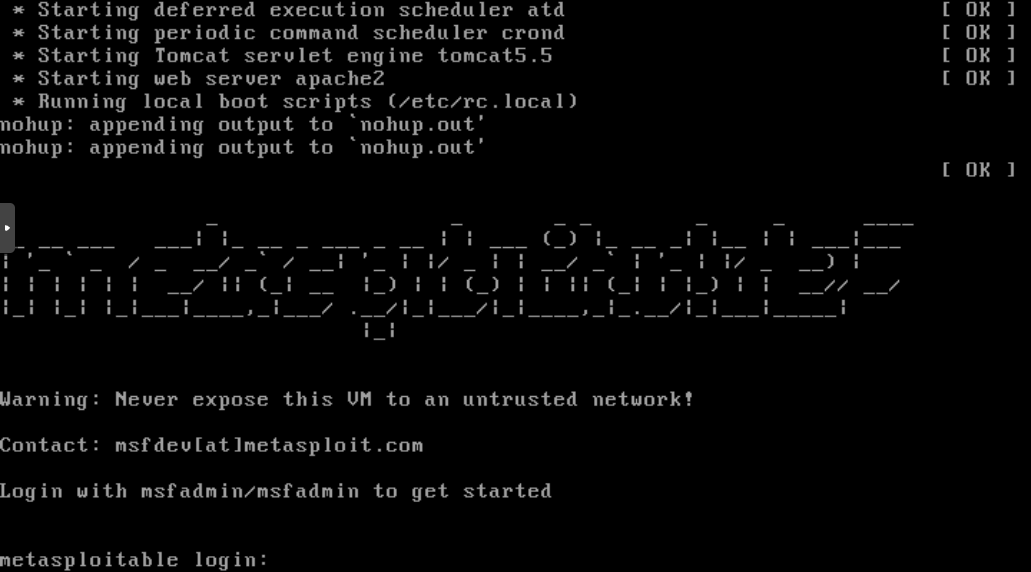
Save and Exit. Head back to the VM we created for Metasploitable2 and Start it. After it boots you should see a screen prompting for creds. Use msfadmin for both the username and password to login.
Once logged in, lets check to see if it got assigned an IP.
1
ip a l eth0
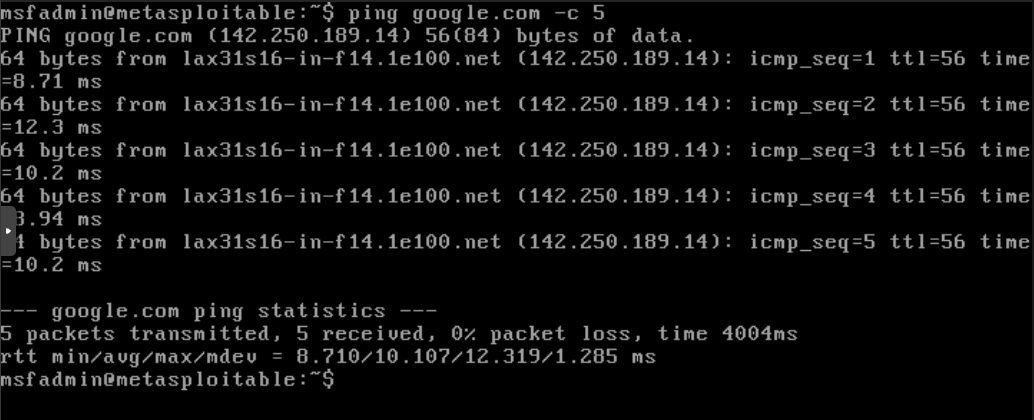
 Let’s test internet connectivity by doing:
1
ping google.com -c 5
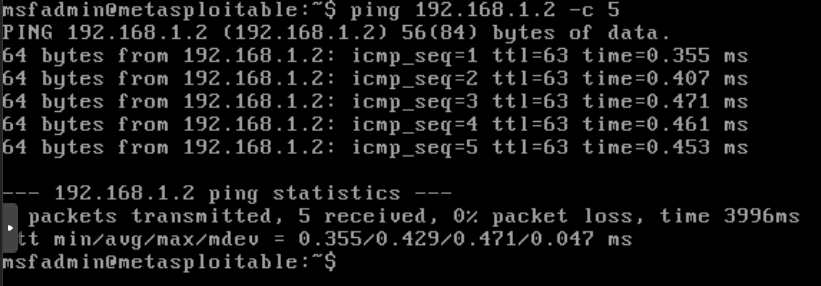
Let’s test our kali VM as well
1
ping 192.168.1.2 -c 5
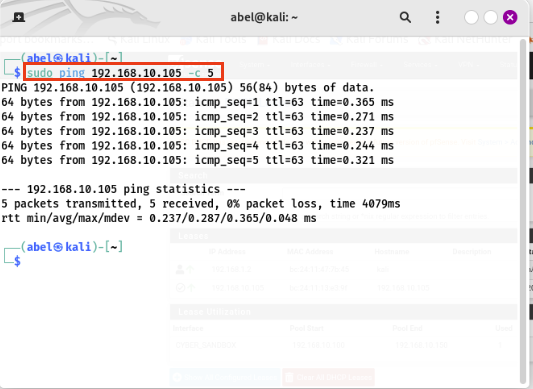
Lastly, let’s check if we can reach metasploitable2 from our kali VM
1
sudo ping 192.168.10.105 -c 5
Damn Vulnerable Web Application
Now, that we finished Metasploitable2 lets jump straight to the next part which is the Damn Vulnerable Web. This will consist of us creating an ubuntu server, docker, and finally the Damn Vulnerable Web itself.
First, we need to have the Ubuntu Server ISO available in our storage. Refer to the previous posts on how to add the ISO to your storage.
Download Link: Ubuntu Server ISO
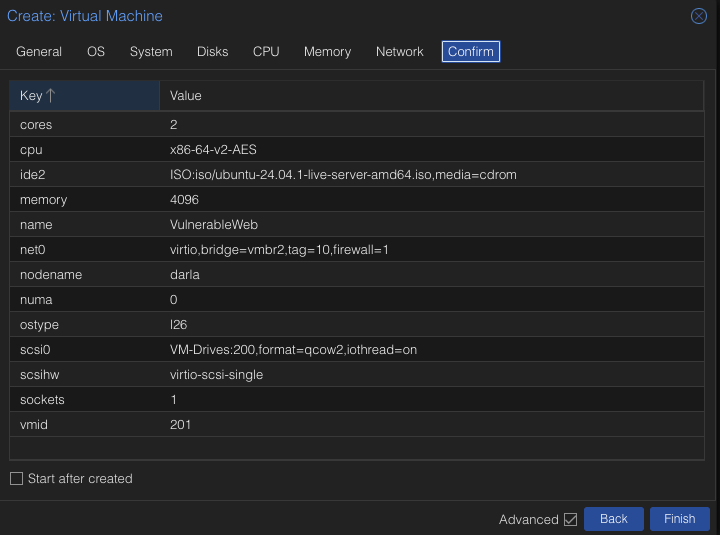
Create a new VM with the following configuration.
Name: VulnerableWeb
OS: Ubuntu Live Server
Disk Size: 200 GB
Cores: 2
Memory: 4096 MiB
Bridge: vmbr2 VLAN Tag: 10
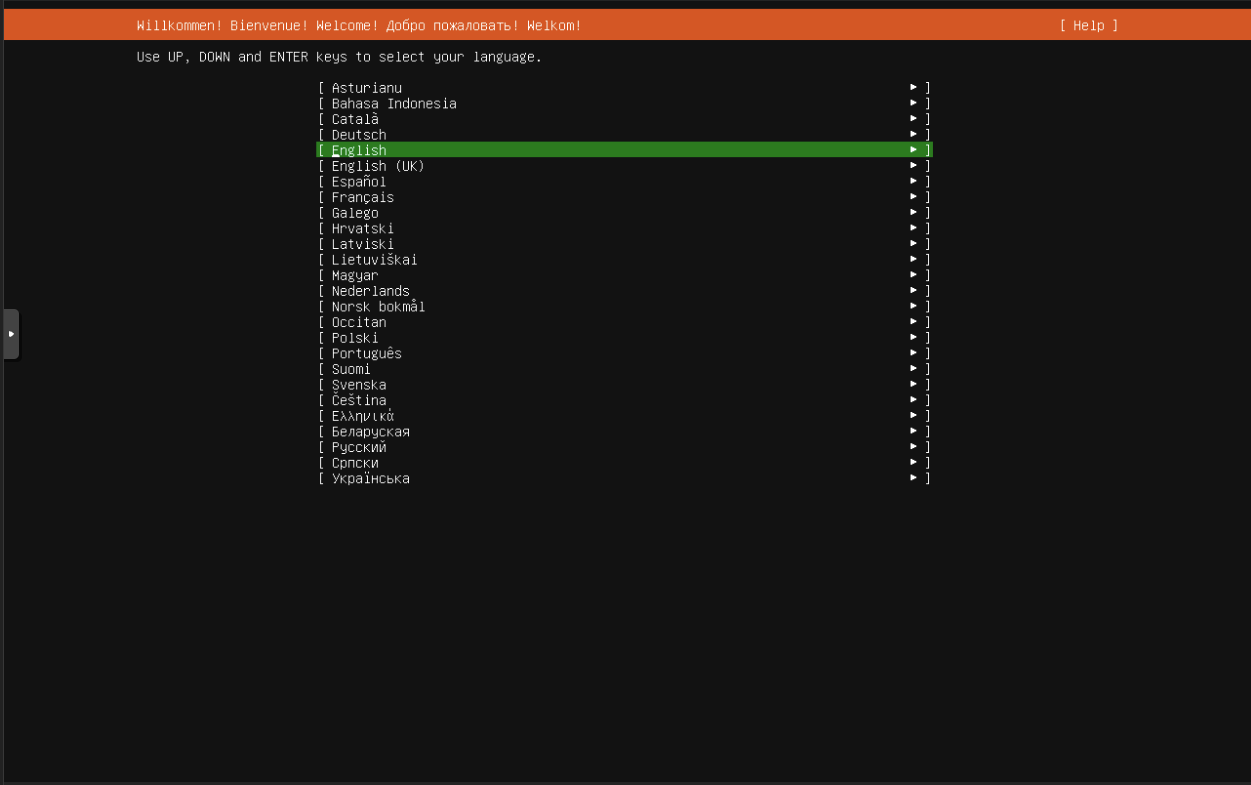
The Setup is straightforward. Mostly hitting next with a few changes.
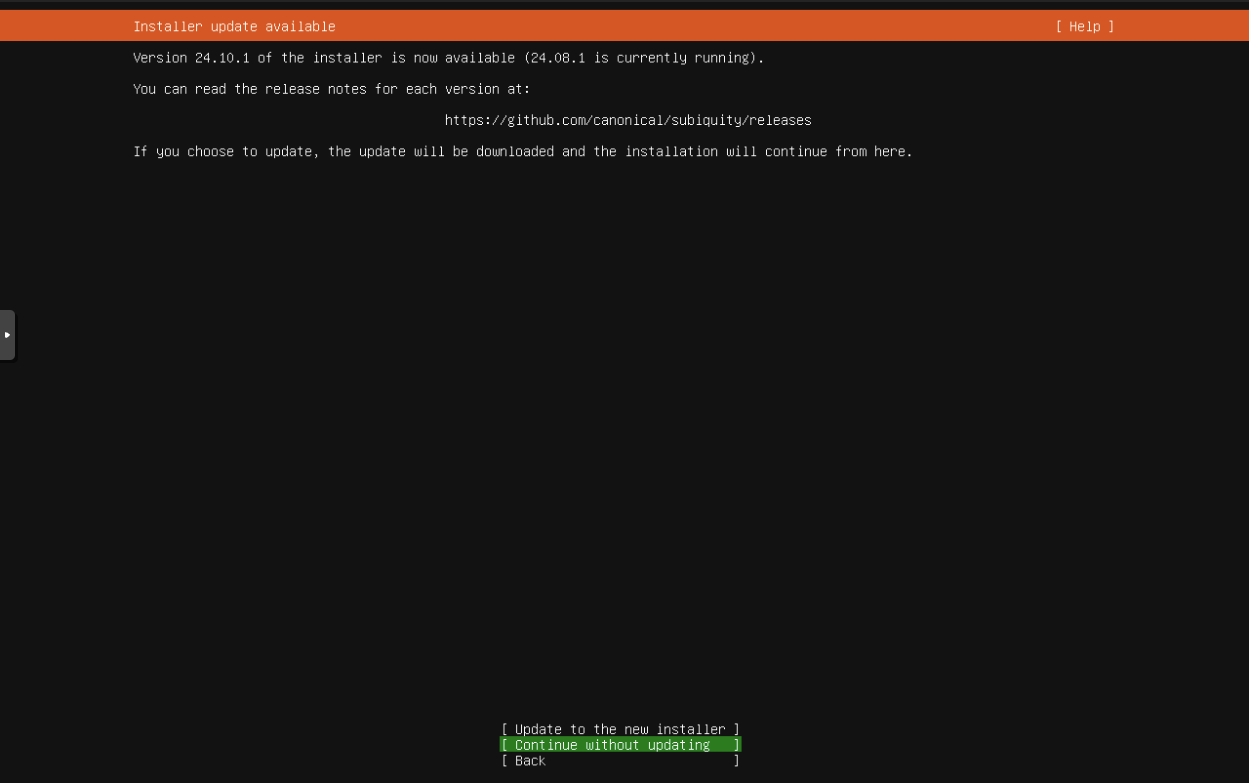
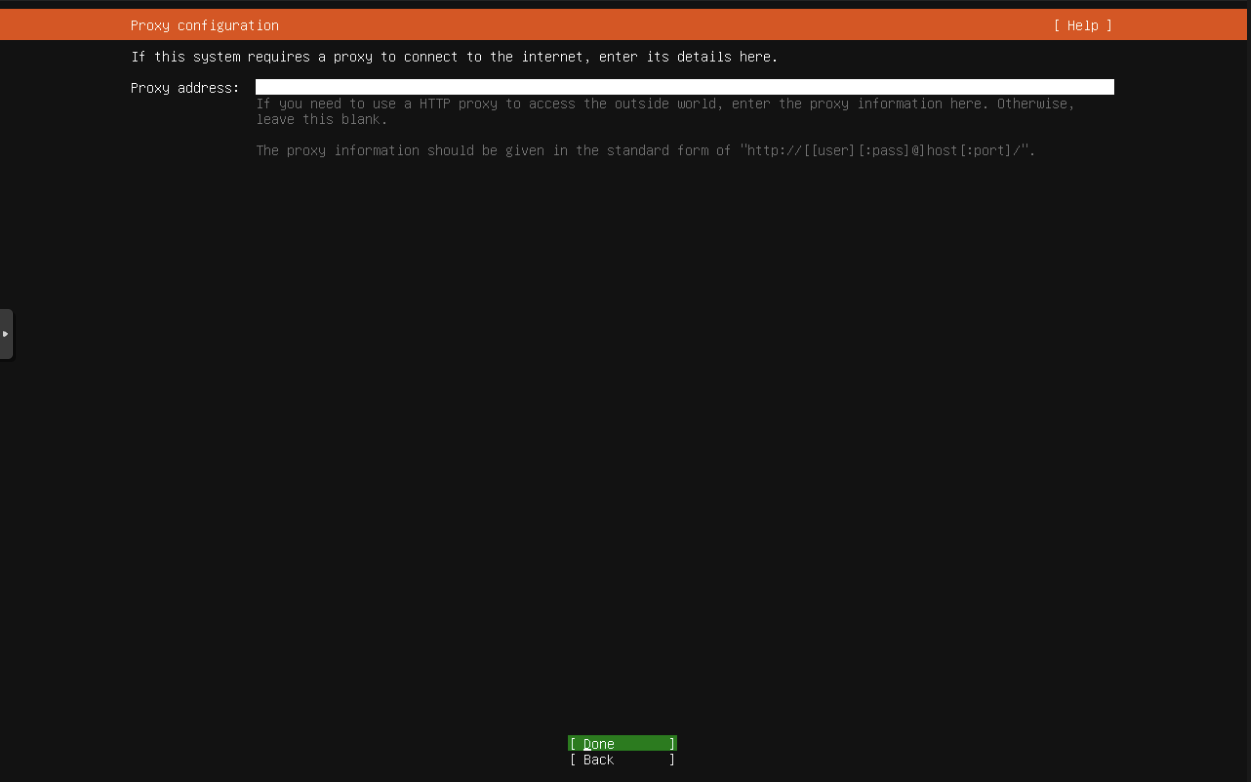
Hit Continue without updating.
Verify you have are on the 10 Subnet. In this case we are.
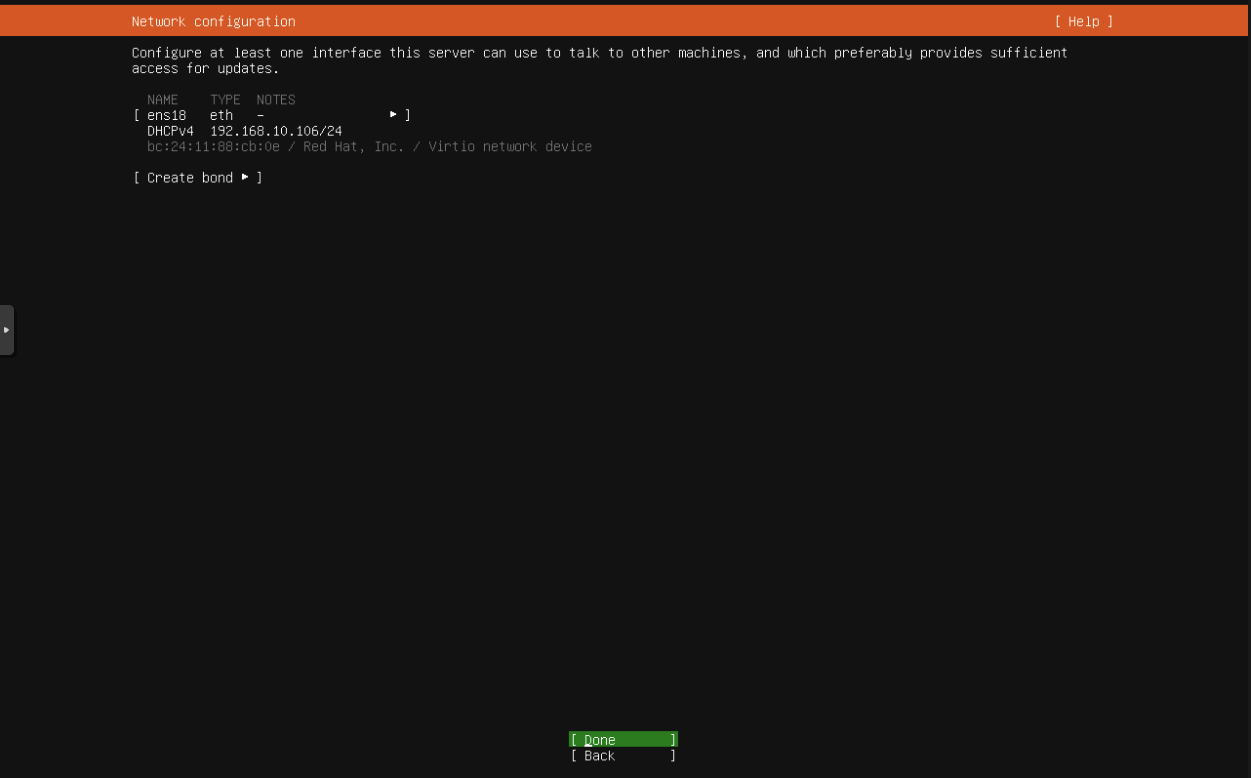
Hit Done.
Hit Done
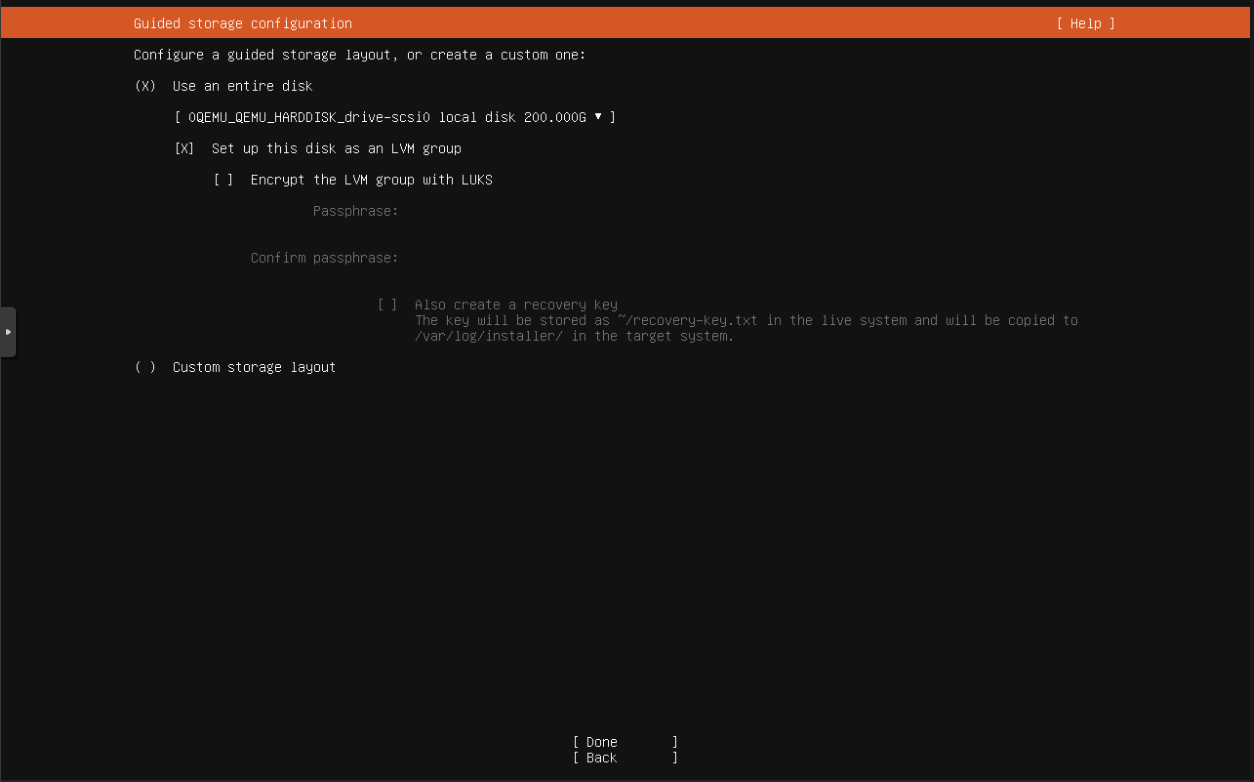
Hit Done.
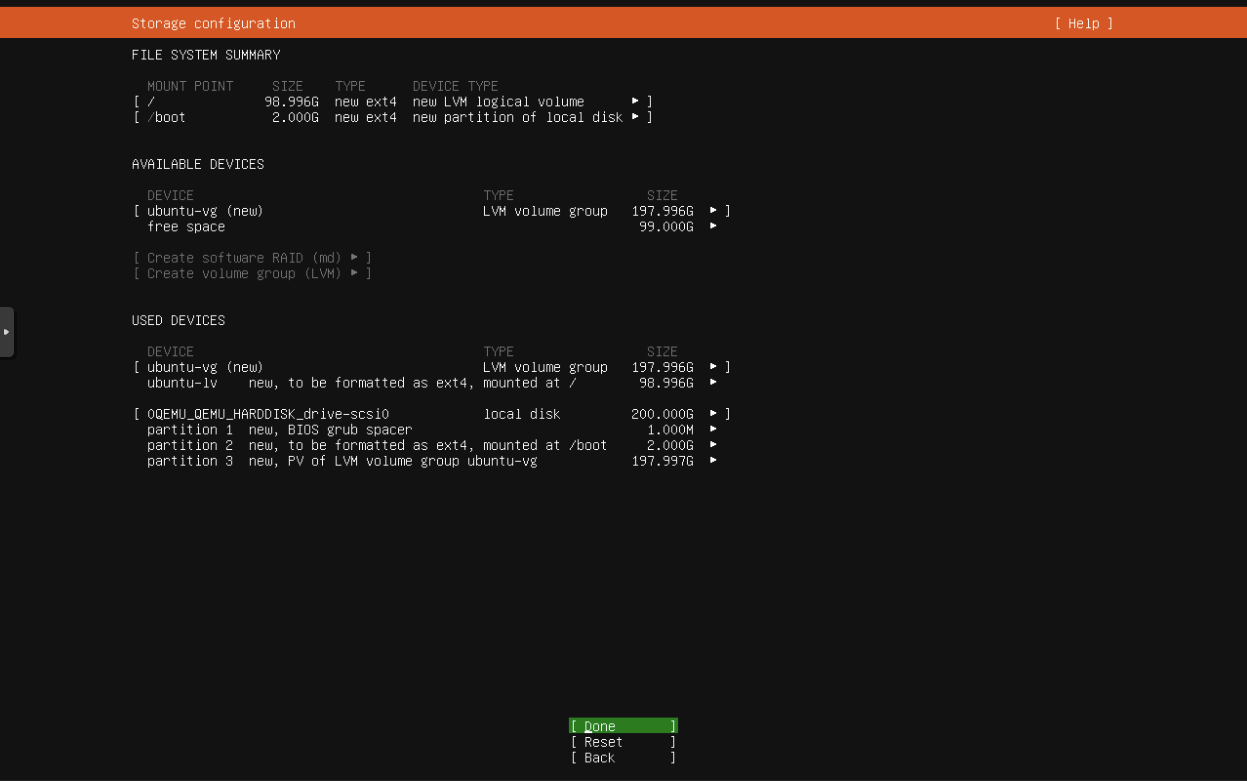
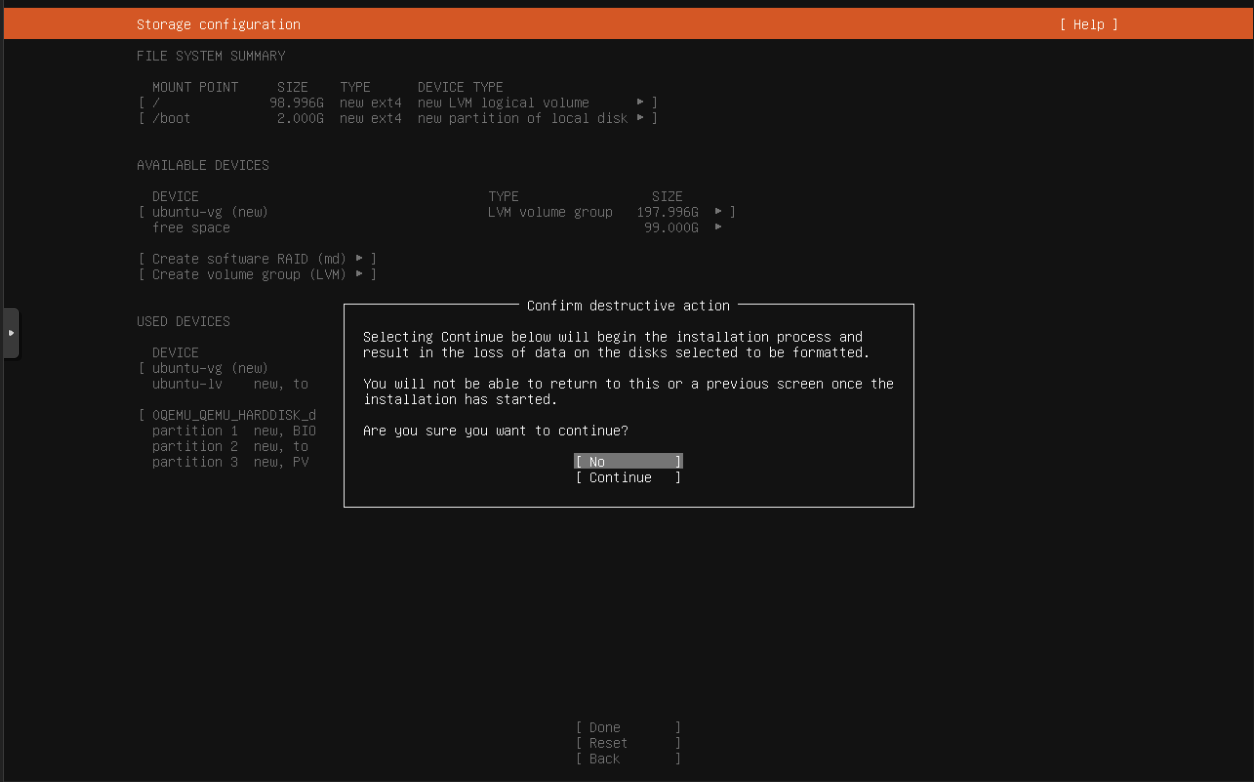
Hit Continue.
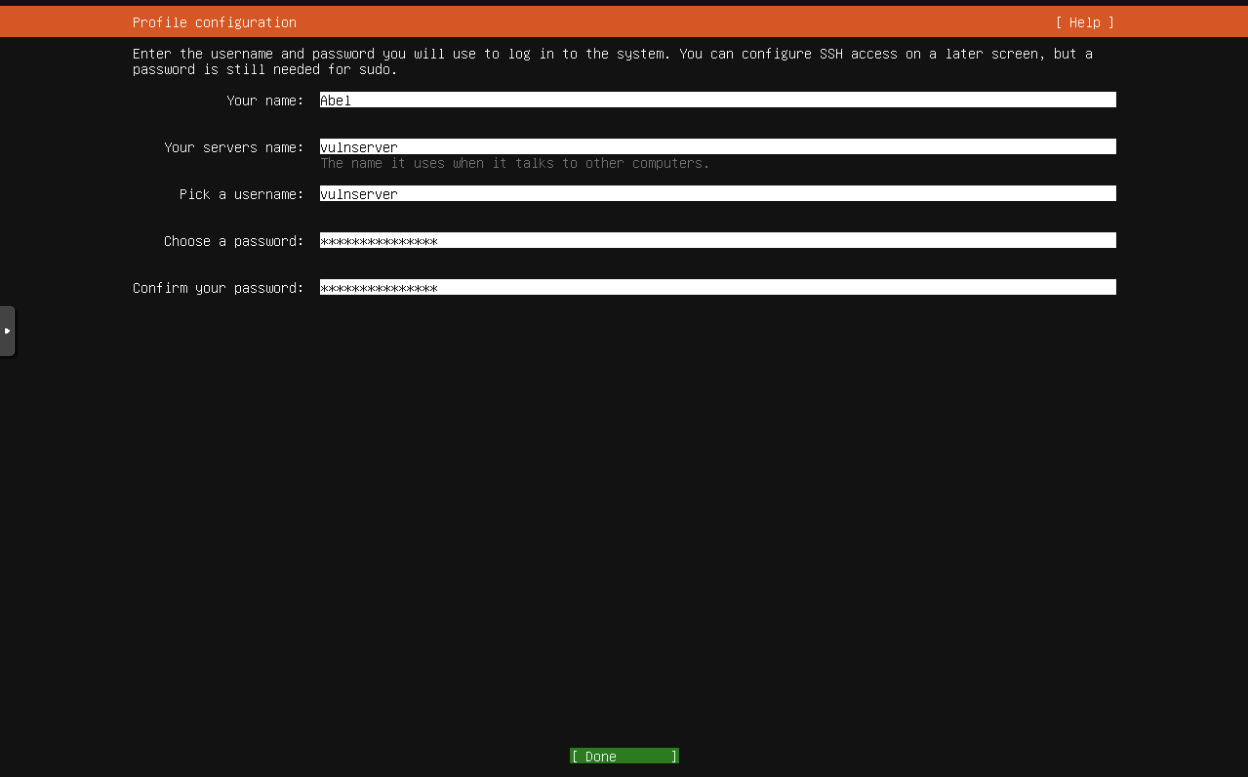
Fill in the blanks with your desired names, username, and password.
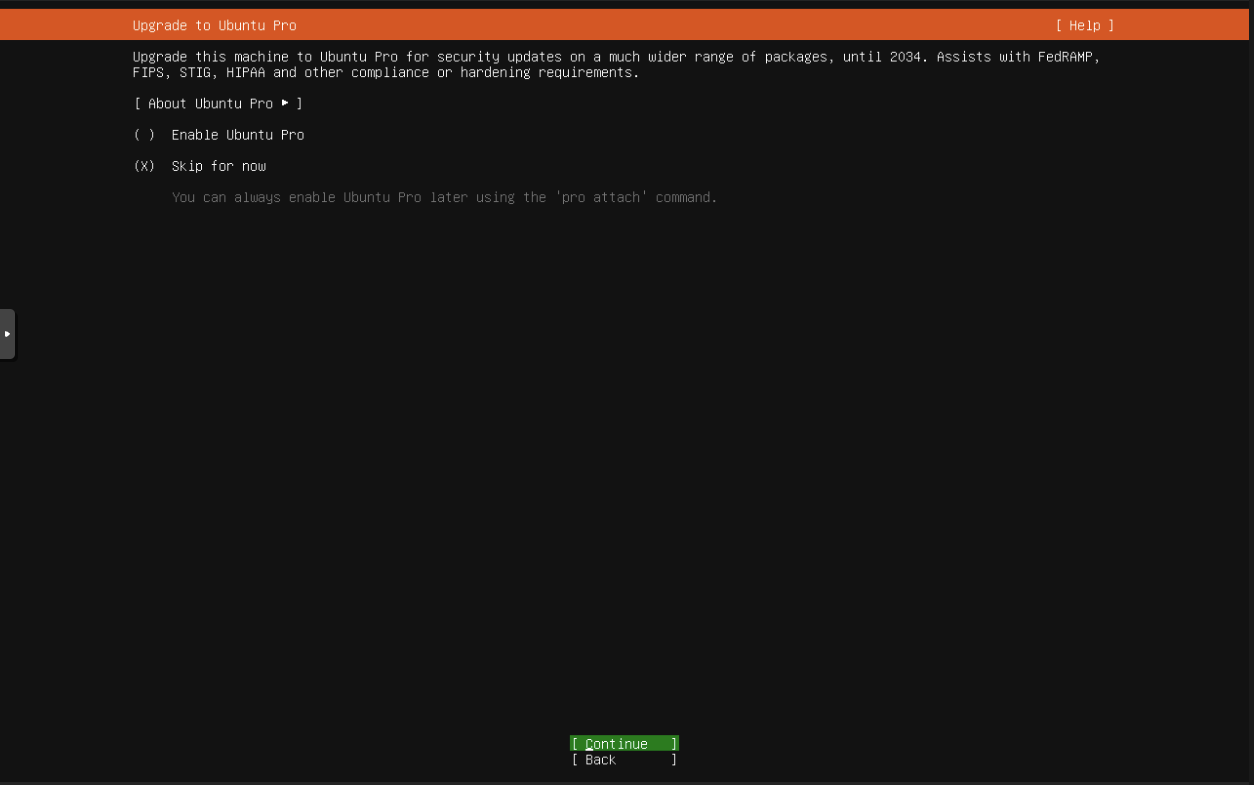
Make sure Skip for Now is selected. Hit Done.
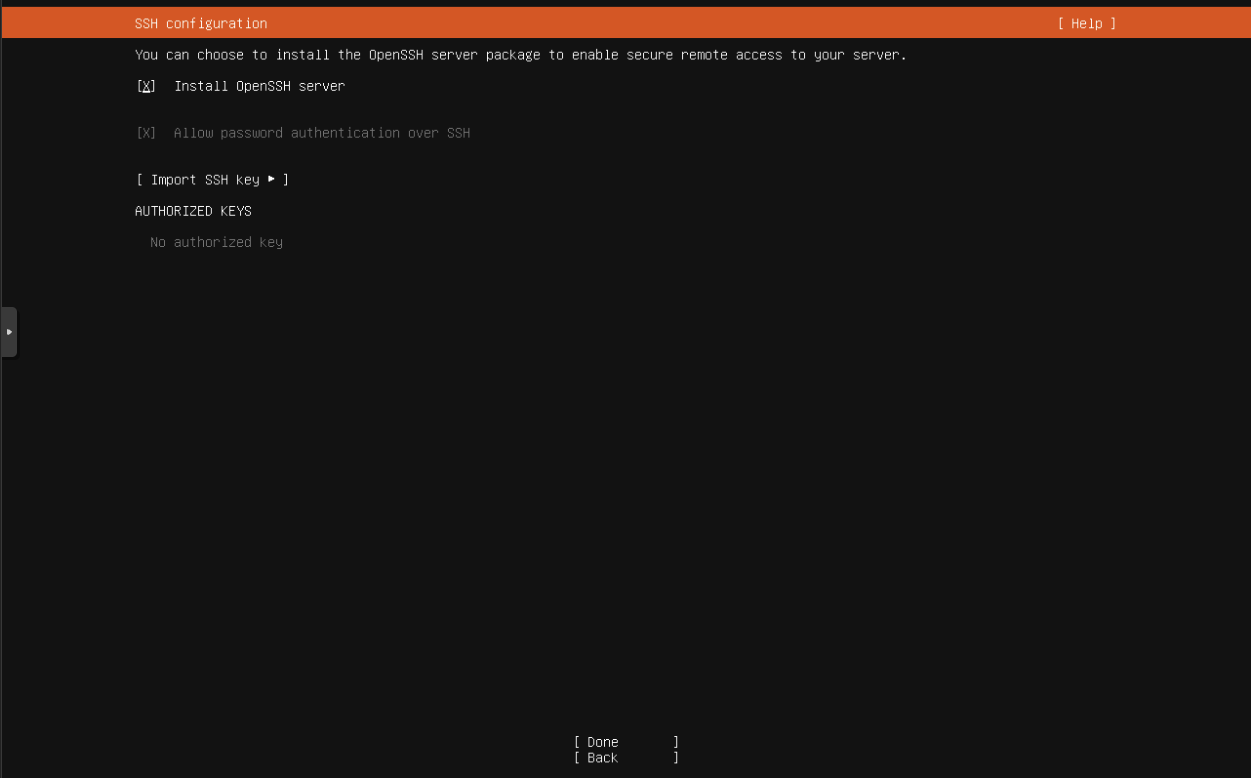
Make sure Install OpenSSH Server is checked and Hit Done.
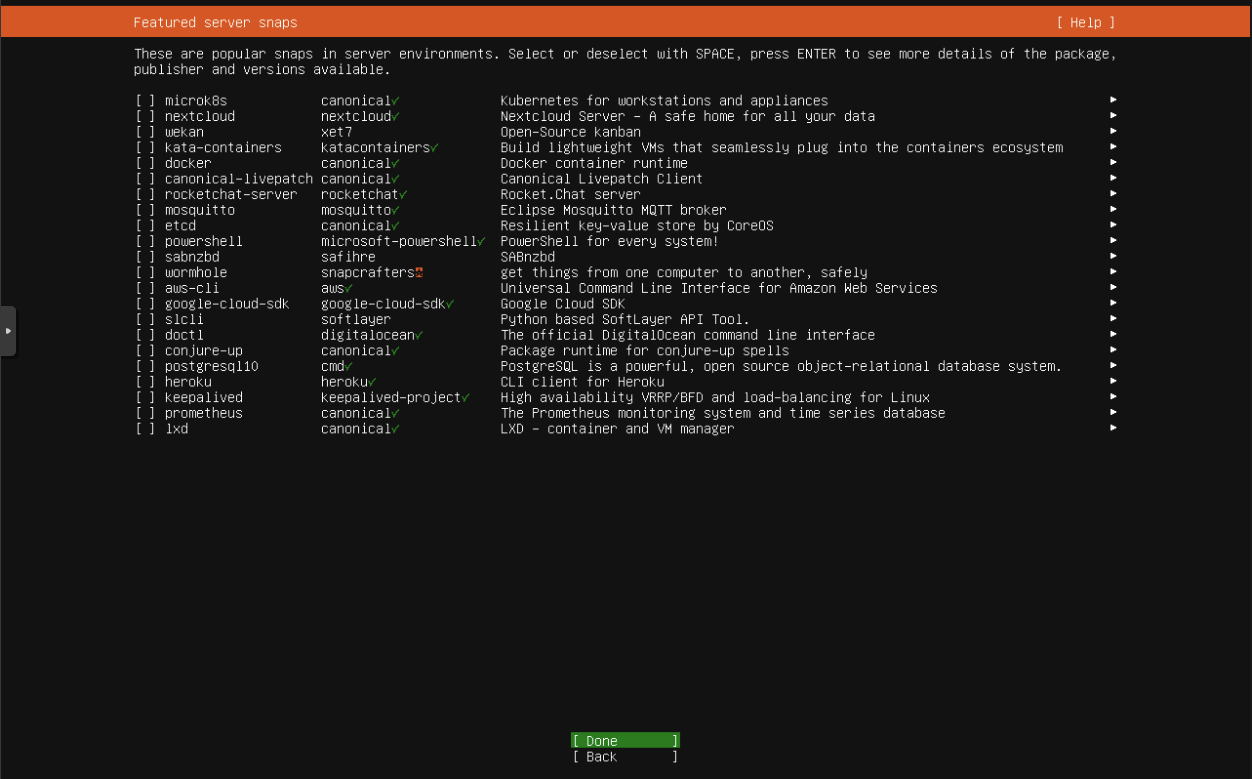
Don’t check anything. Hit Done.
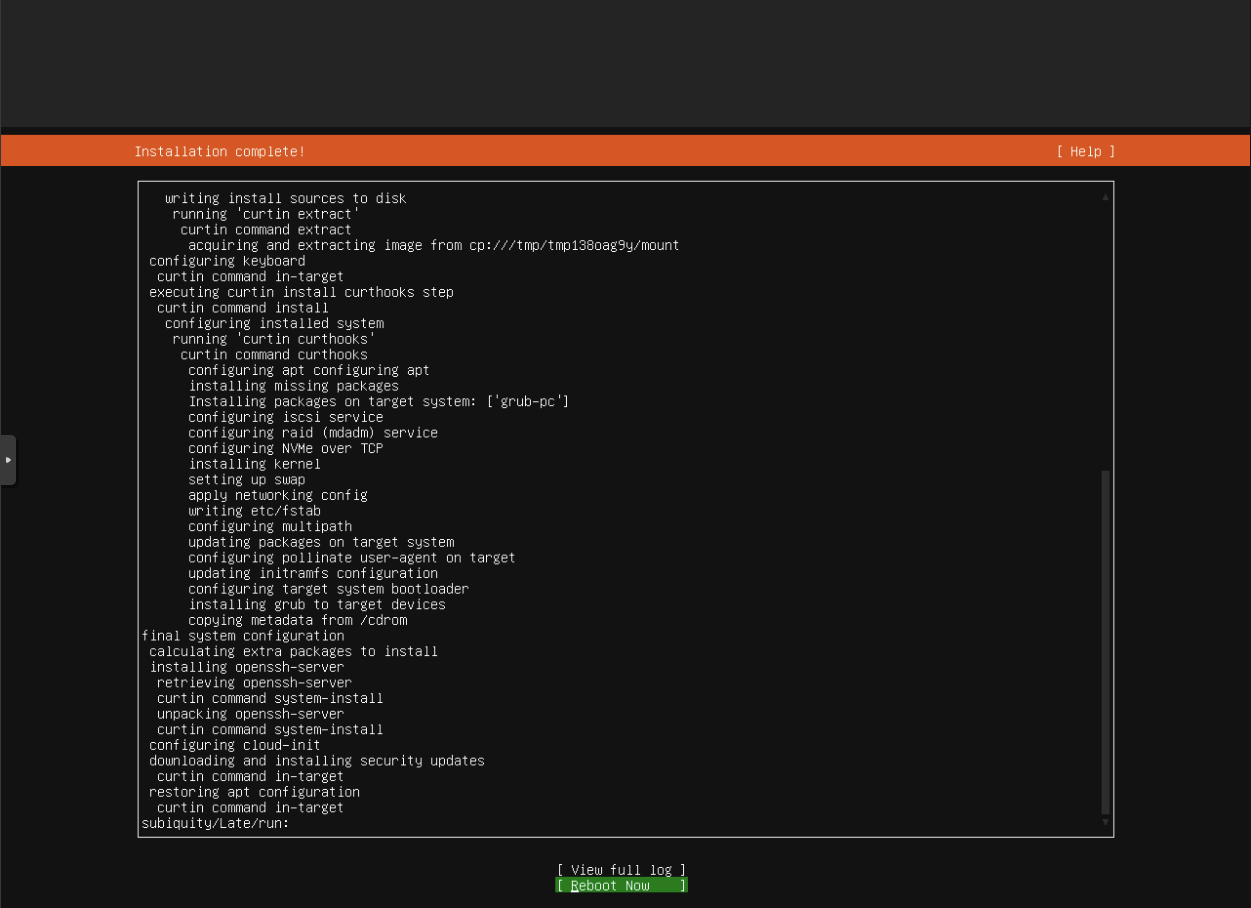
Hit Reboot Now and Done!
Once it has booted up and you have logged in with your username and password you created earlier. Enter the following command to view our subnet.
1
ip a
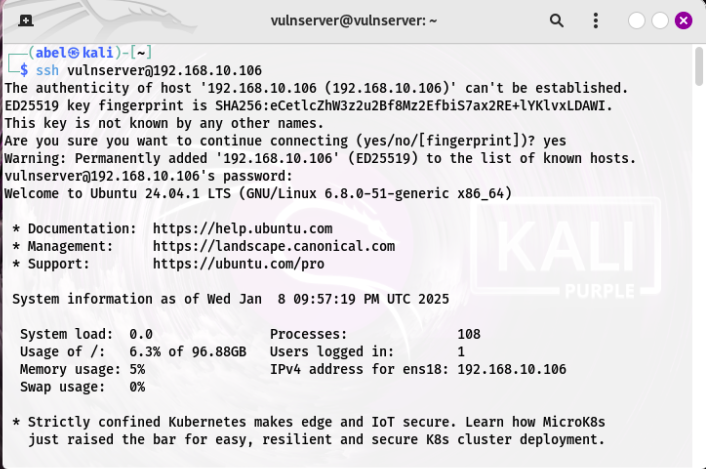
After verifying that we the correct subnet. We will head back to our kali machine and ssh into our ubuntu server. It will ask you to fingerprint, type yes and will also ask for the password for the ubuntu server.
1
ssh vulnserver@192.168.10.106
Let’s run an update for the ubuntu server.
1
 sudo apt update ** sudo apt upgrade
Now, we are going to install some the GPG key and the docker repository to our APT Sources. for docker. Copy and Paste the following command below:
1
2
3
4
5
6
7
8
9
10
11
12
13
# Add Docker's official GPG key:
sudo apt-get update
sudo apt-get install ca-certificates curl
sudo install -m 0755 -d /etc/apt/keyrings
sudo curl -fsSL https://download.docker.com/linux/ubuntu/gpg -o /etc/apt/keyrings/docker.asc
sudo chmod a+r /etc/apt/keyrings/docker.asc

# Add the repository to Apt sources:
echo \
  "deb [arch=$(dpkg --print-architecture) signed-by=/etc/apt/keyrings/docker.asc] https://download.docker.com/linux/ubuntu \
  $(. /etc/os-release && echo "$VERSION_CODENAME") stable" | \
  sudo tee /etc/apt/sources.list.d/docker.list > /dev/null
sudo apt-get update
You will need to bring this post up inside of the Kali Machine as copy and pasting through VMs does not work. Unless you found a way to make it work please let me know!
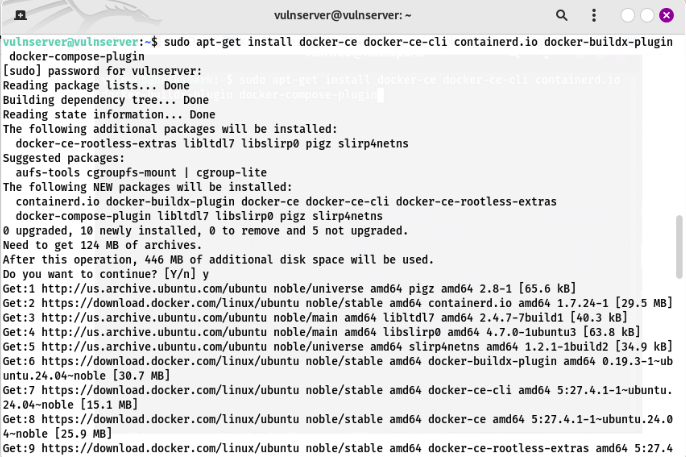
Now that we have those installed. We can install docker and then our portainer container.
1
sudo apt-get install docker-ce docker-ce-cli containerd.io docker-buildx-plugin docker-compose-plugin
Now, we can create the portainer volume!
1
sudo docker volume create portainer_data

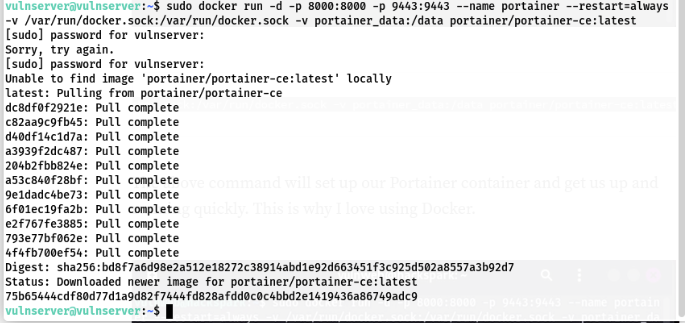
And, finally we run the following command to set up the portainer container.
1
docker run -d -p 8000:8000 -p 9443:9443 --name portainer --restart=always -v /var/run/docker.sock:/var/run/docker.sock -v portainer_data:/data portainer/portainer-ce:latest
Lets see if our containers are running and on what ports by doing:
1
sudo docker ps

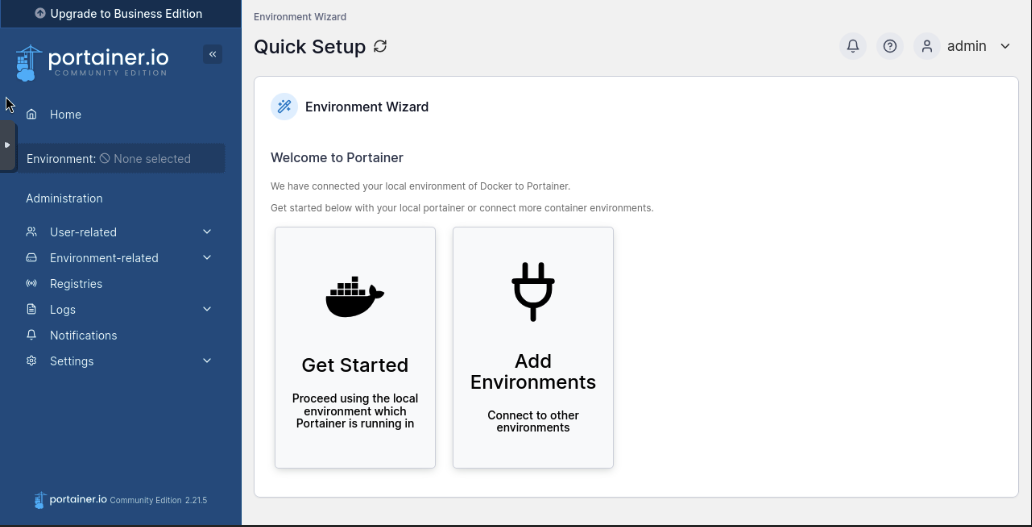
Now, that our portainer instance is live. Use the ip of our ubuntu server. In my case its 192.168.10.106, and enter it into firefox. We enter: https://192.168.10.106:9443
Once entered you will see Warning Potential Security Risk Ahead. We will click Accept the Risk and Continue.
It will then prompt use to create a username and password. Simple stuff. Finally you’ll see a screen like mine.
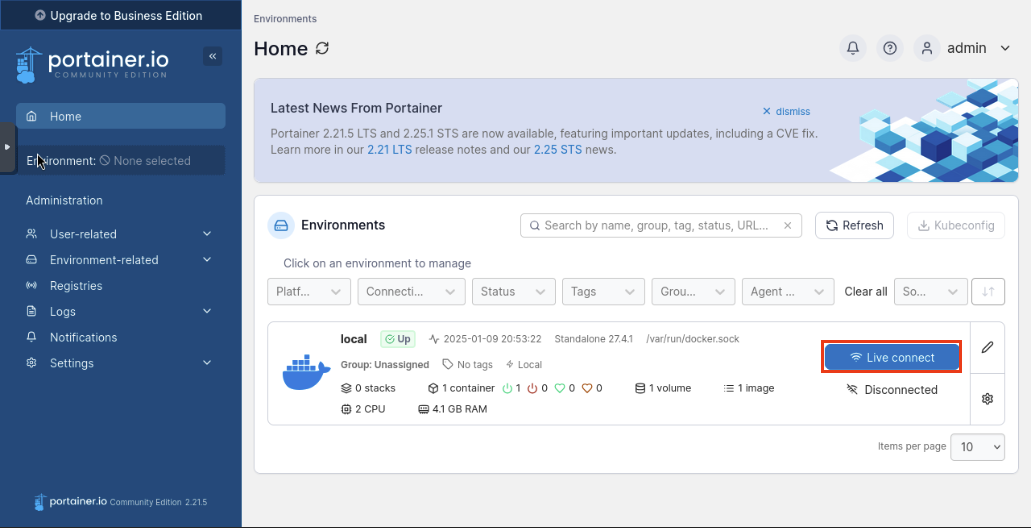
Awesome! Now let’s click Home then click Live Connect
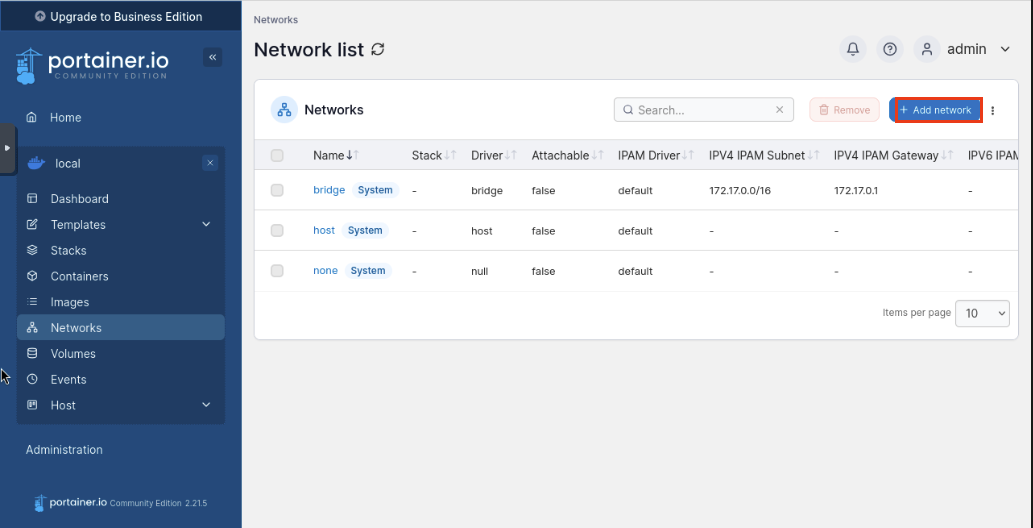
Click Networks then Add Network.
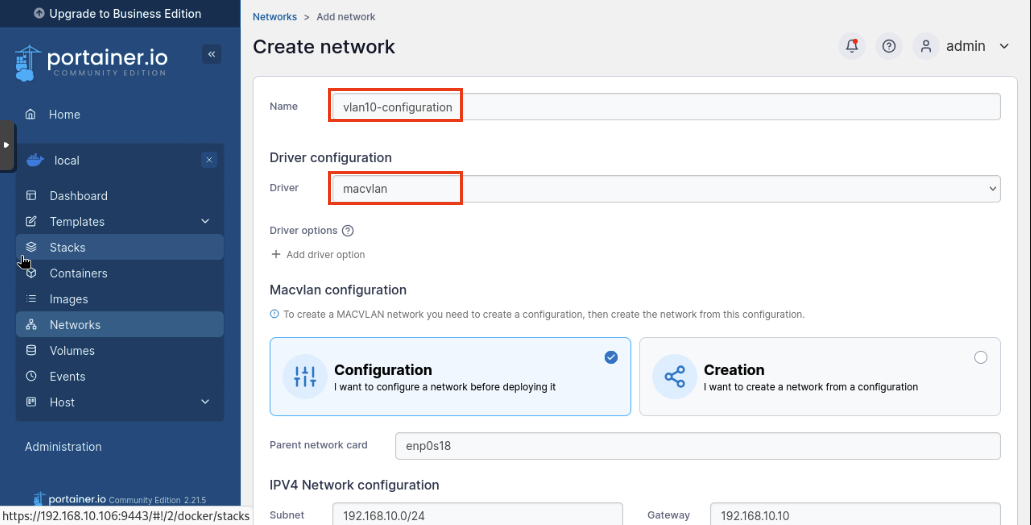
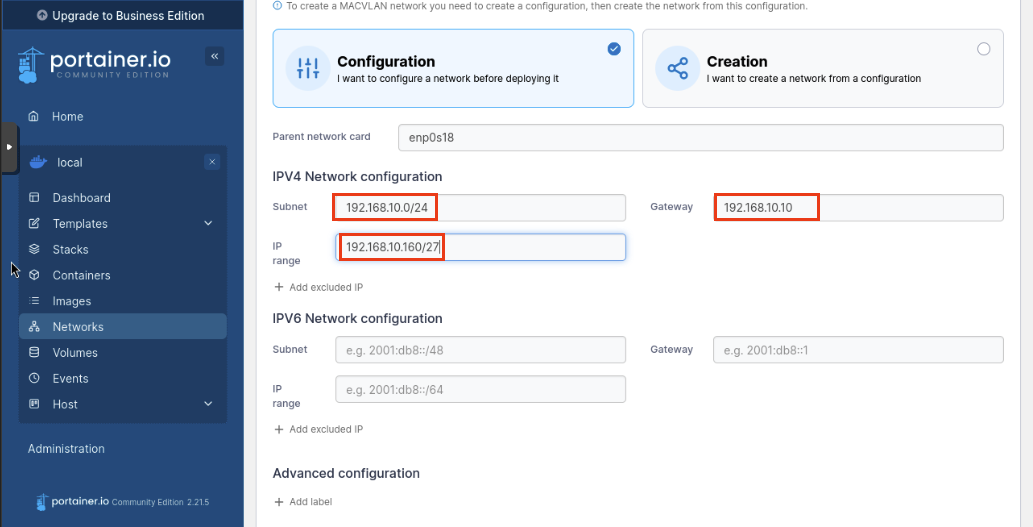
Let’s enter the following:
Name: vlan10-configuration
Driver: macvlan
Macvlan Configuration: Configuration
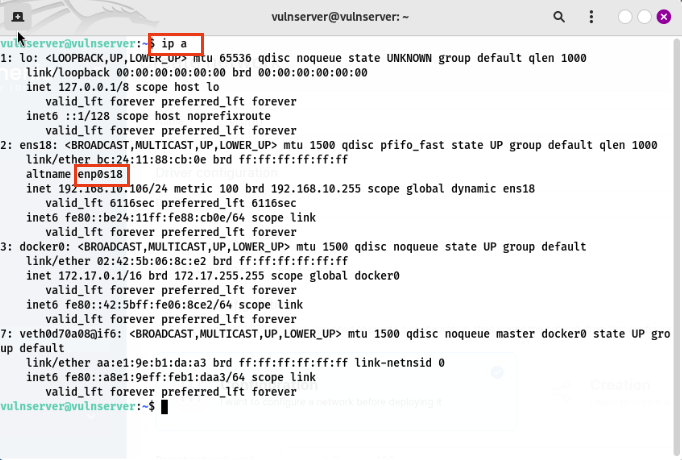
Parent Network Card: enp0s18
Your parent network card might be different. Run the following command in a terminal to determine it.
1
ip a
If you have been using my IP scheme then this should be an easy copy paste but if not you will have to determine these:
Subnet: 192.168.10.0/24
Gateway: 192.168.10.10
IP Range: 192.168.10.160
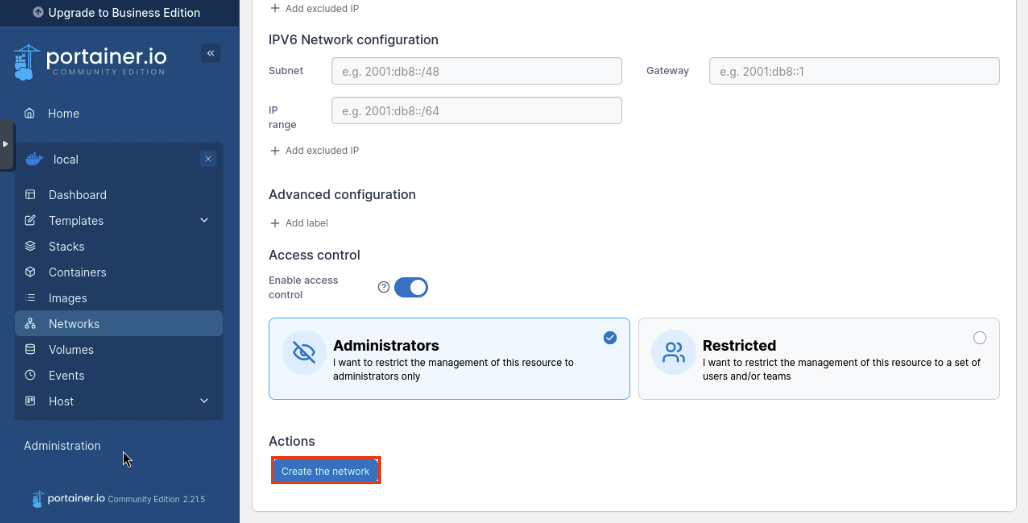
Click Create the Network
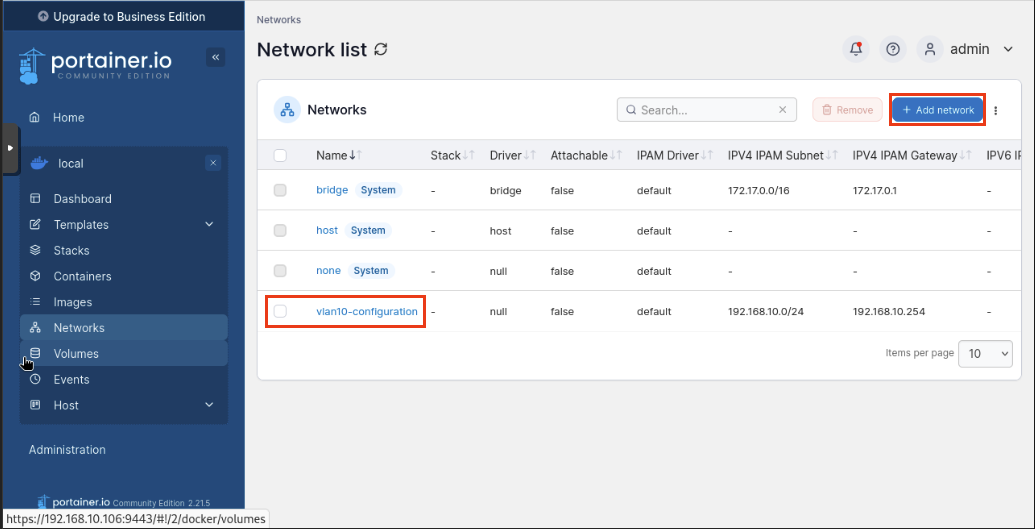
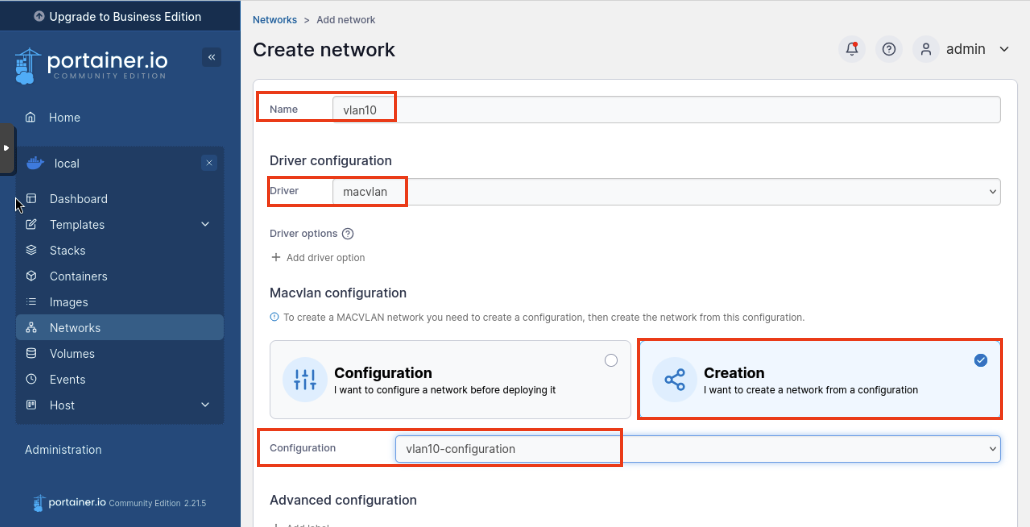
Nice! We finished the VLAN configuration for our container. Now we will create the actual VLAN. Click Add Network again.
Enter the following:
Name: vlan10
Driver: macvlan
Macvlan Configuration: Creation
Configuration: vlan10-configuration
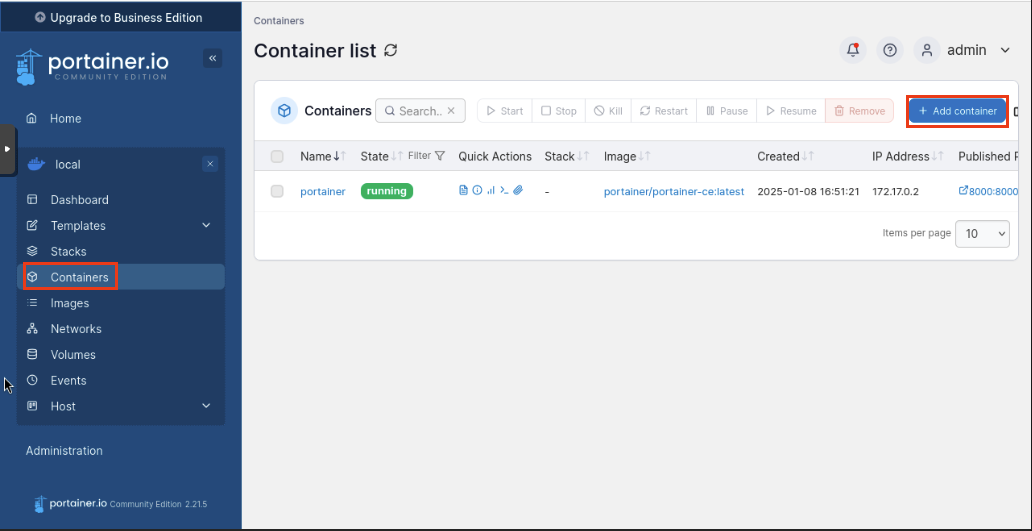
Navigate back to our local container and click Containers then Add Container
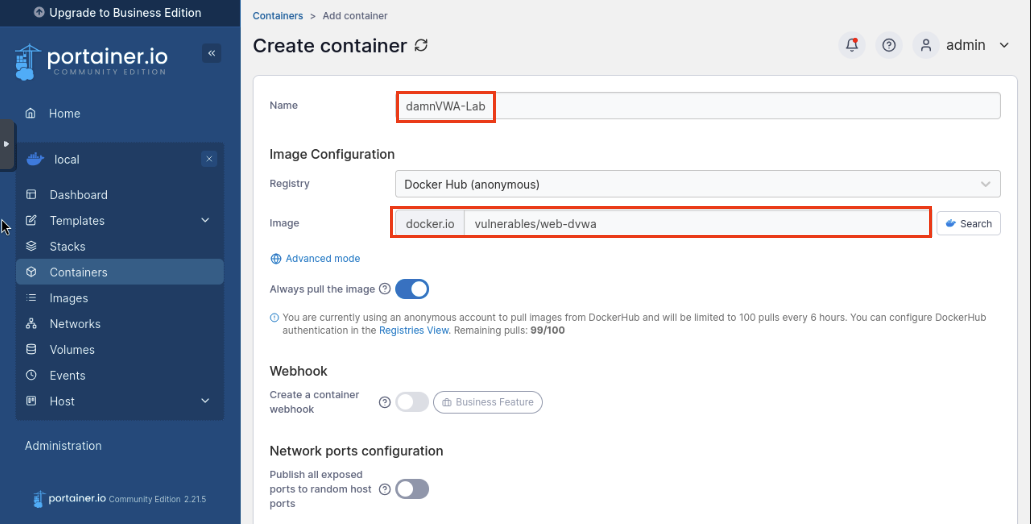
Fill in the following:
Name: damnVWA-Lab
Image: vulnerables/web-dvwa
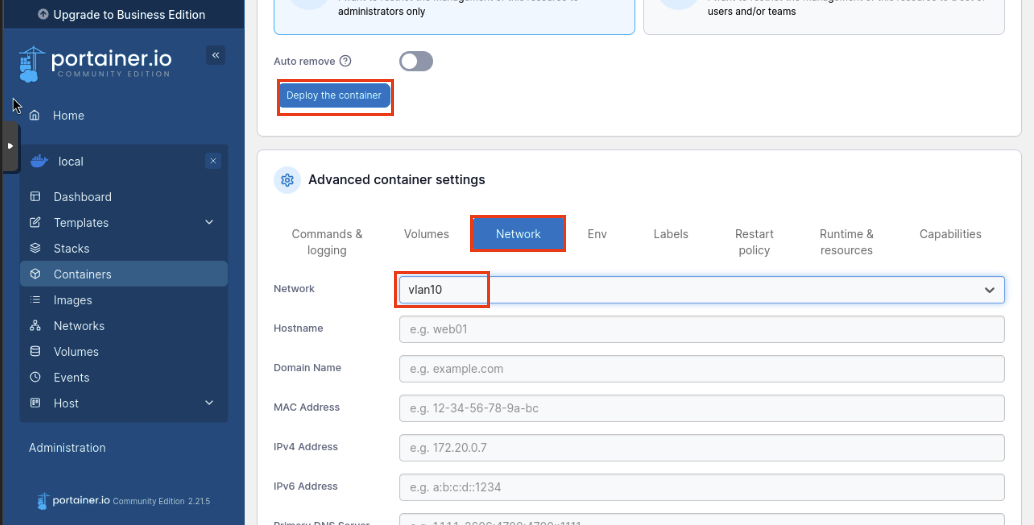
Scroll down. Now we are going to assign vlan10** as our network. Click **Deploy the container`.
Let’s head back over to Container. You can see that our container has been created. Note the ip address.
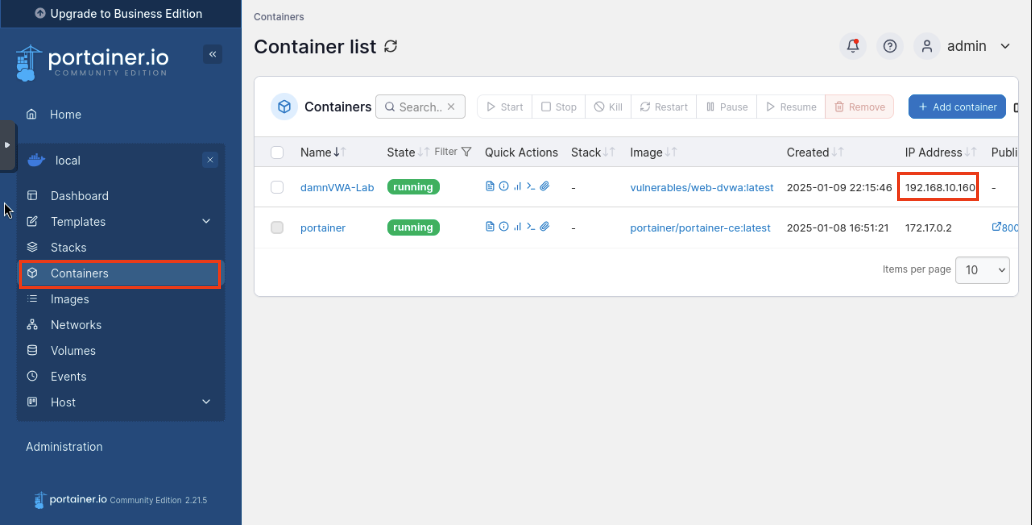
Open up a new tab on your browser and type in https://192.168.10.160. You should see DVWA and BAM! You have successfully set up a Damn Vulnerable Web Application. You are now free to start breaking into it!

Keep an eye out for the next module where we will begin configuring out Active Directory Lab!