Building a CyberSecurity Home Lab with Proxmox: Part 5 - Active Directory Lab Setup - Part 1
A Guide on Building a Cybersecurity Home Lab using Proxmox
Banner Background by Andrea Charlesta
Welcome back! I hope everyone is having a great beginning to their year. I want to give a shoutout to the firefighters in LA fighting those wildfires, you guys have my utmost respect. In this part we are going to be setting up and configuring out Active Directory Lab. It will consist of three VMs. The first VM we will be creating will serve as our domain contorller and DHCP for the two VMs. The Domain Controller (DC) will be ran on Windows Server 2022. The other two VMs will be running Windows 10.
You are more than welcome to run this Active Directory lab with just one Windows 10 client and it will work just fine. I am running it with two because there are certain payloads/attacks that require two client machine, one such being NTLM Relay Attack. We will also be setting up snapshots to revert back to a state before any attacks. This helps make our lives easier by not having to remake the VMs after each attack.
Microsoft Evaluation Trial Period
Don’t worry about this, Microsoft gives a trial license of x amount of times depending on the OS. It will function completely fine after the trial period is over.
Windows ISO Downloads
Windows Server 2022 (64-bit): Click Here
Windows 10 Enterprise (64-bit): Click Here
VirtIO Download: Click Here
VirtIO Drivers
We will need VirtIO drivers for our Windows VM otherwise it will not run on proxmox. Download it normally like you would any ISOs. I will be using theStable virtio-win ISOwhich is what I linked above.
Windows Server VM Creation
Setting up a Windows Machine on Proxmox takes a bit more work than a traditional Linux but its still straightforward. Let’s jump right in.
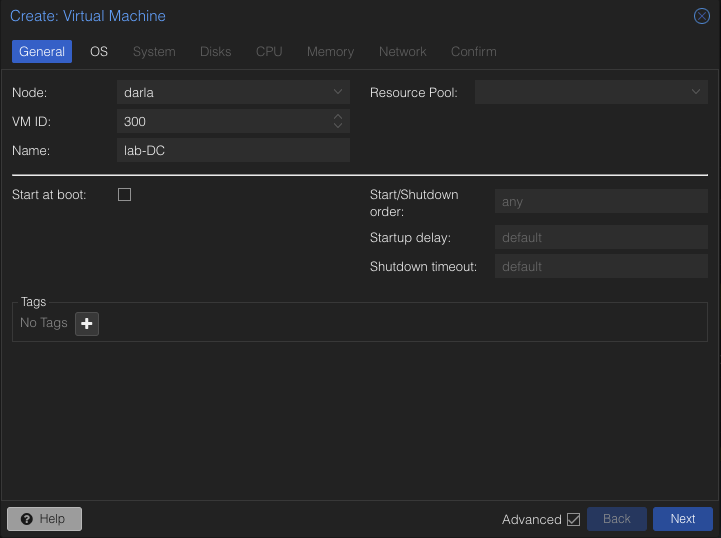
Let’s create a new VM. I am going to call it lab-DC and give the VM-ID: 300. Click Next.
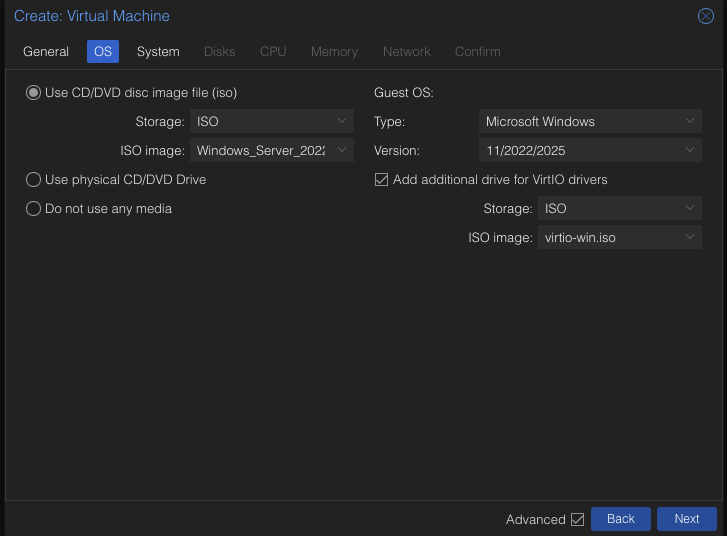
Select the Windows Server 2022 ISO and the Virtio Drivers. Make sure it looks like mine!
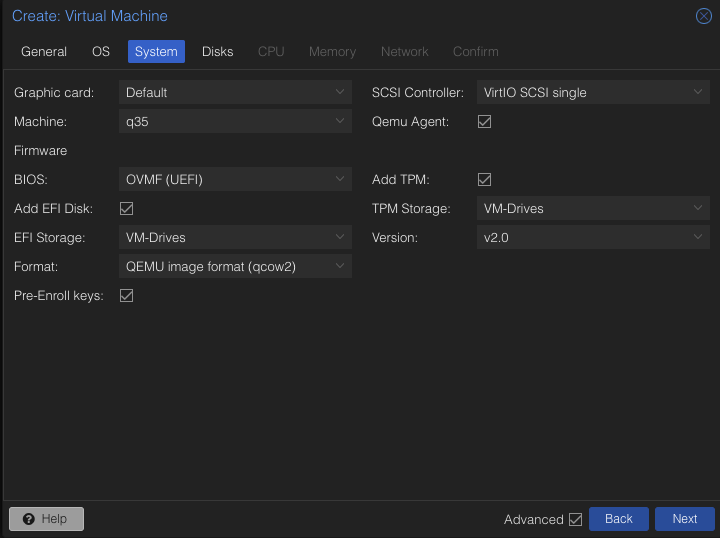
Match up your System tab with the screenshot above. As you saw, alot more options are used for Windows lol.
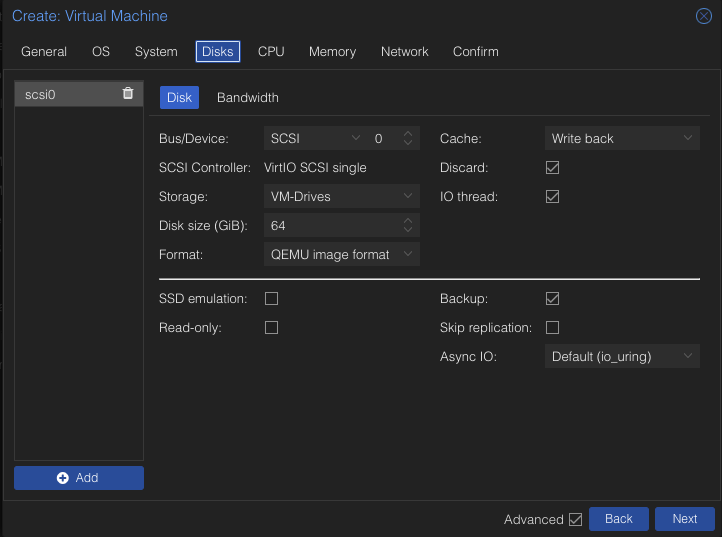
Same thing as the last one. Ensure yours matches the screenshot above. Click Next.
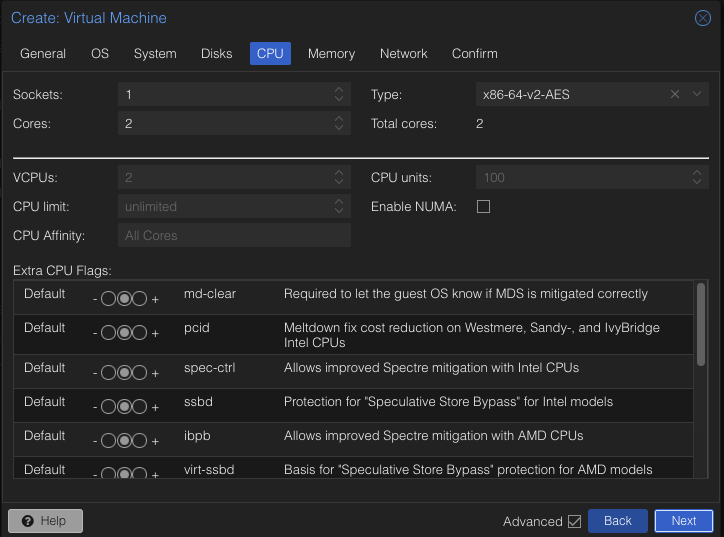
I will give is an extra core. Set the type to x86-64-v2-AES. Click Next.
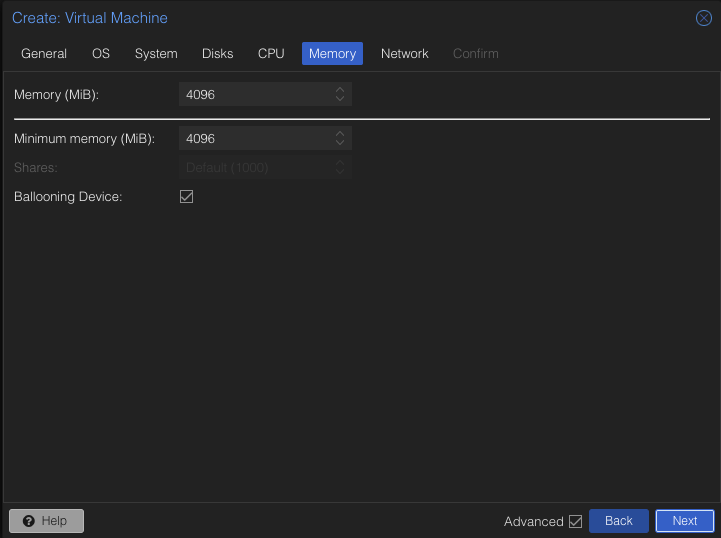
Provide it 4096 MiB of Memory. Click Next.
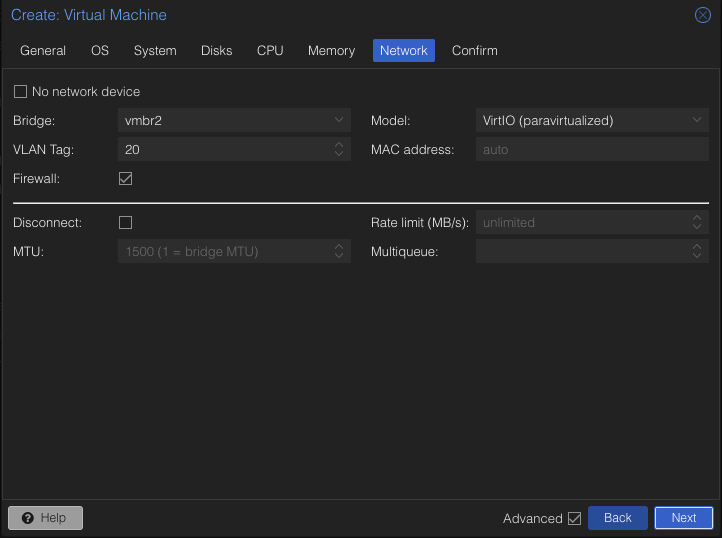
For the Bridge we will use vmbr2 and the VLAN tag will be 20. Click Next.
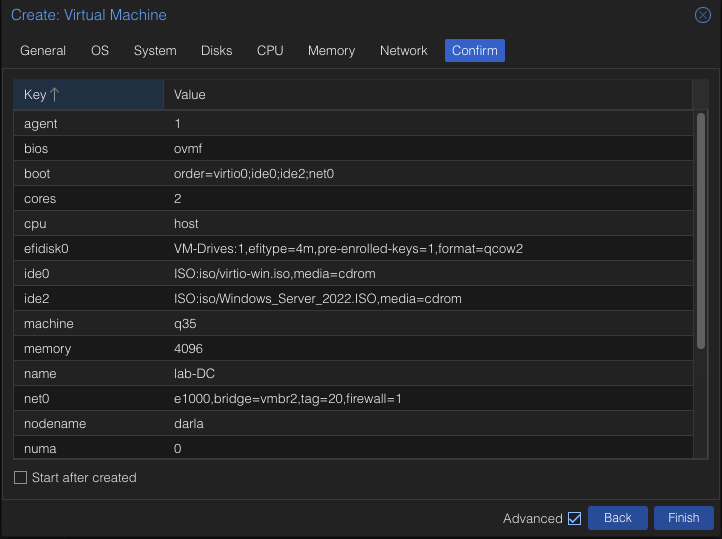
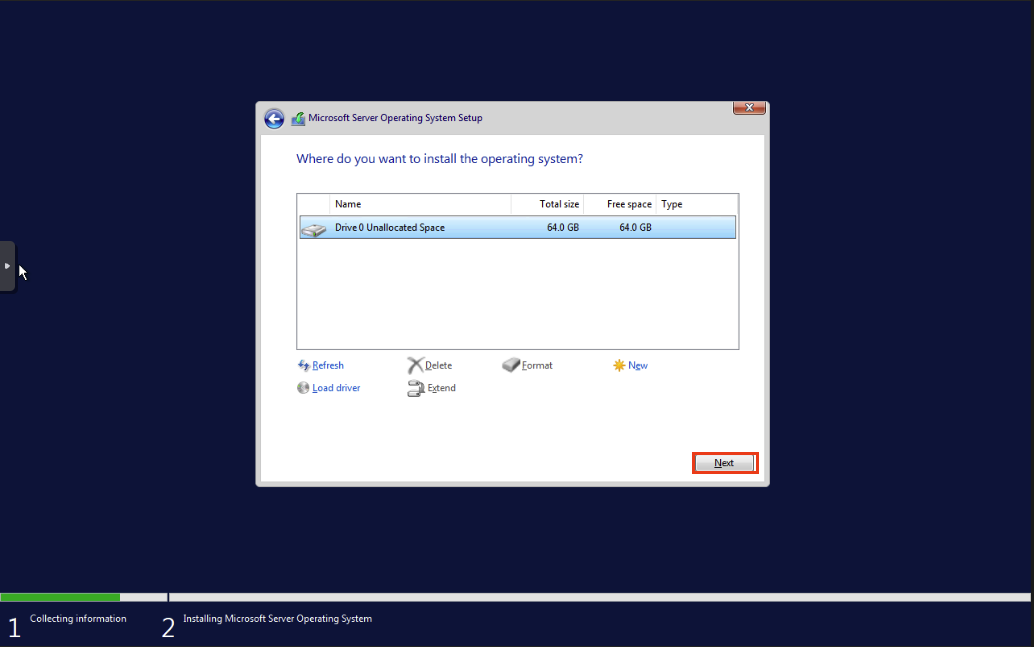
Make sure everything looks good. Click Confirm.
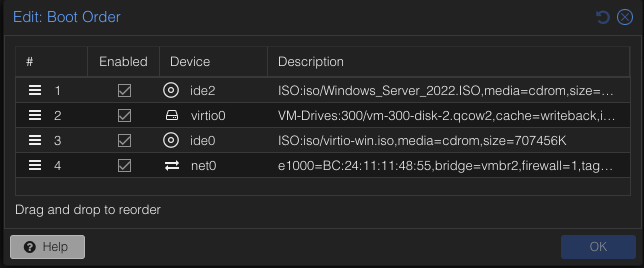
Head over to Options -> Boot Order. Make sure it matches mine. Boot up the VM afterwards.
Windows Server Installation
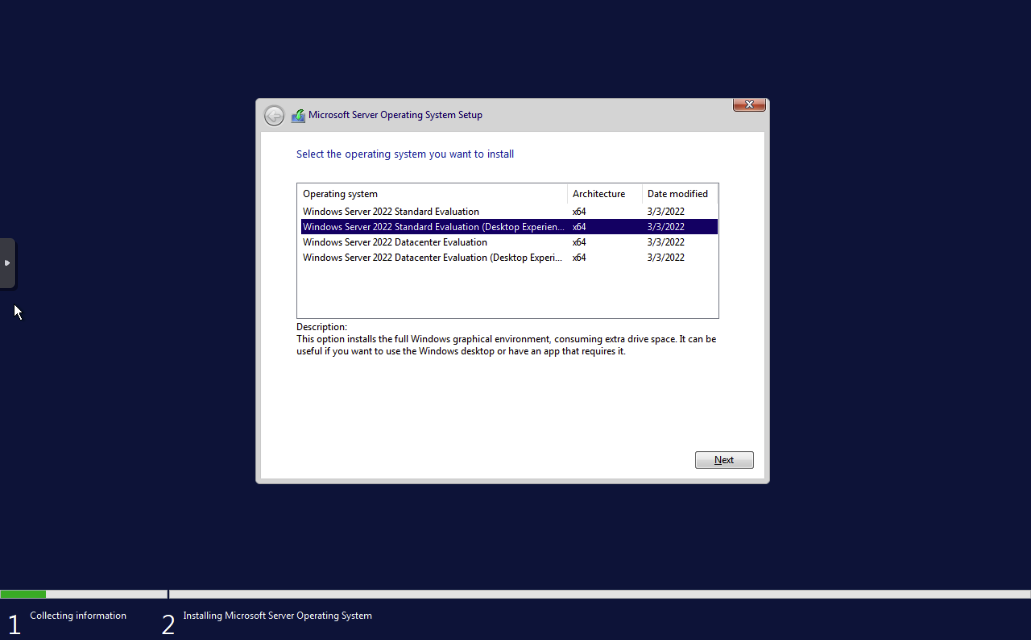
Select Windows Server 2022 Standard Evaluation (Desktop Experience). Click Next.
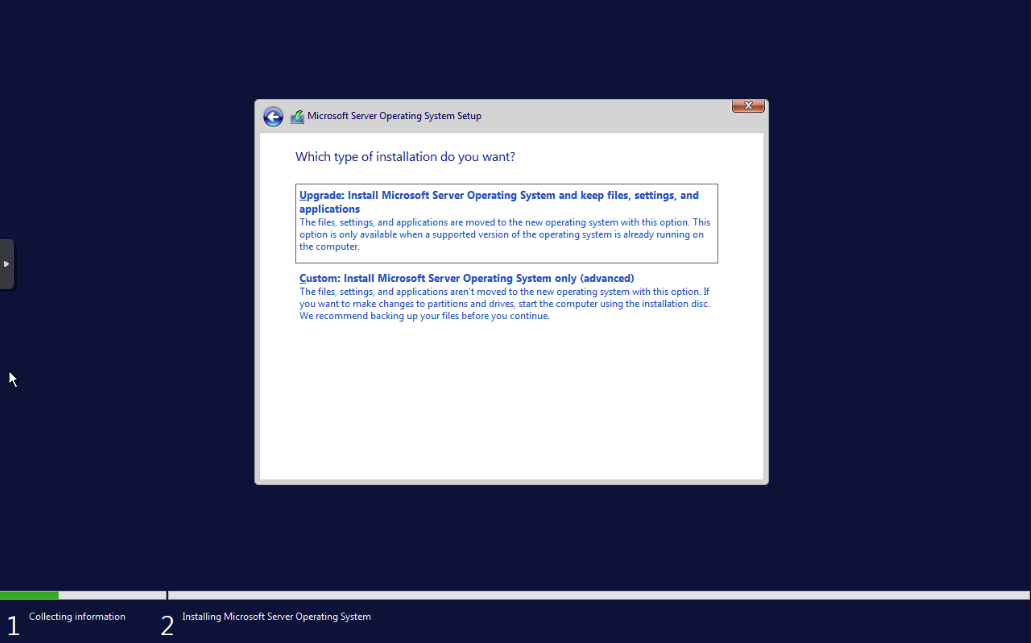
Select Custom: Install Windows only (Advanced).
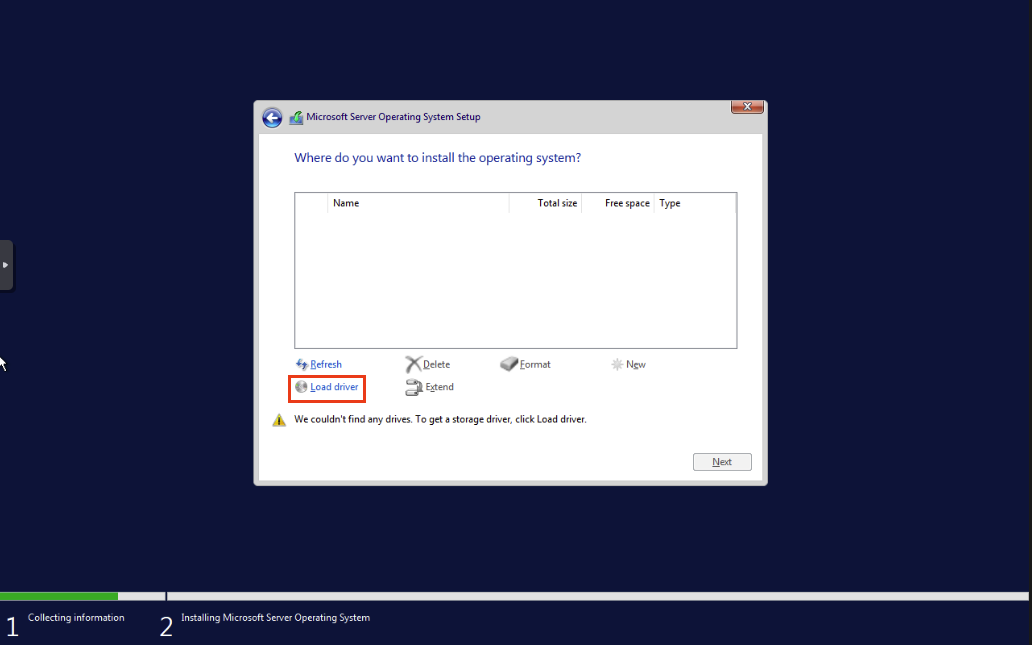
Click Load Driver
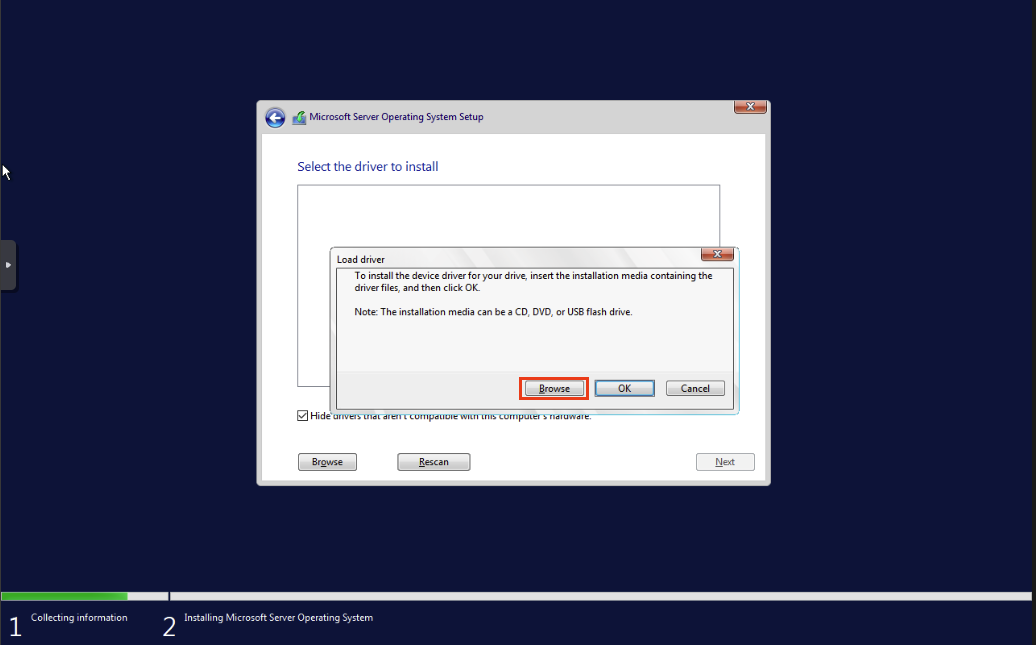
Click Browse.
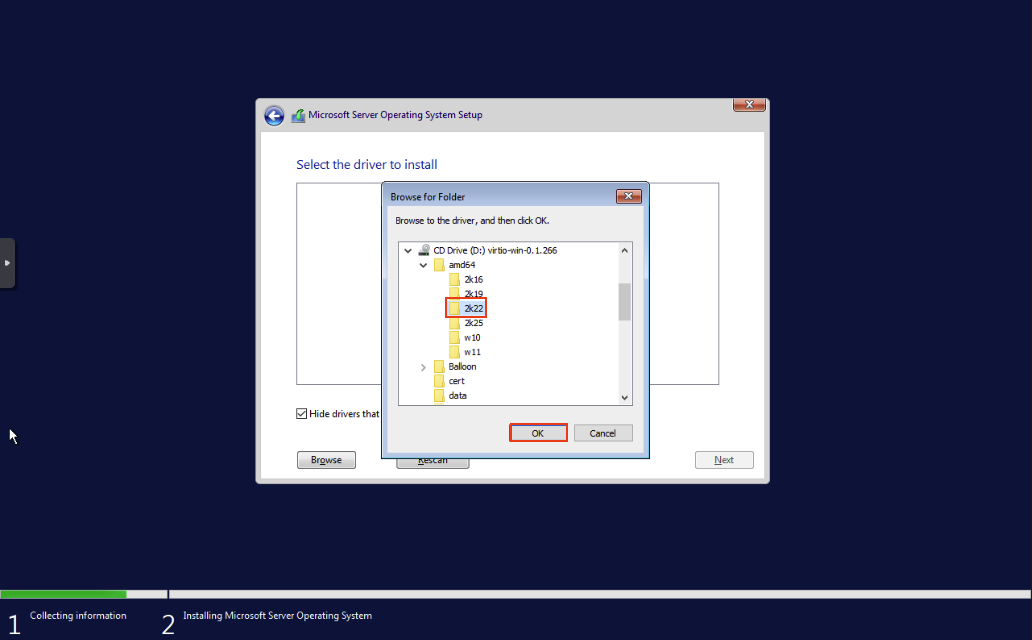
Expand the CD Drive (D:) virtio-win0.1.266 -> amd64. Select the folder 2k22. Click Ok.
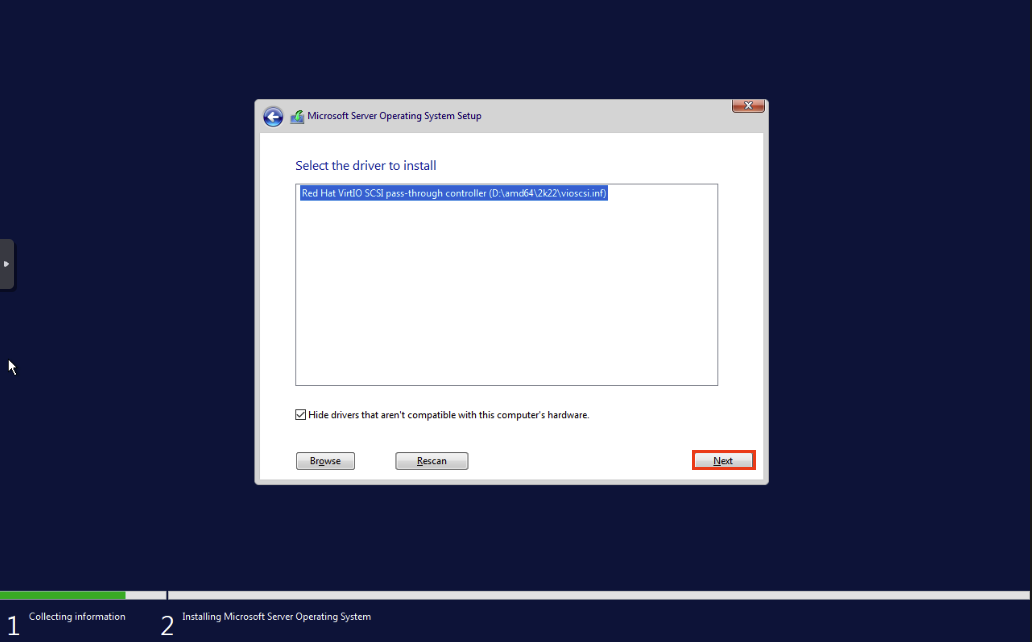
Click Next.
Click Next.
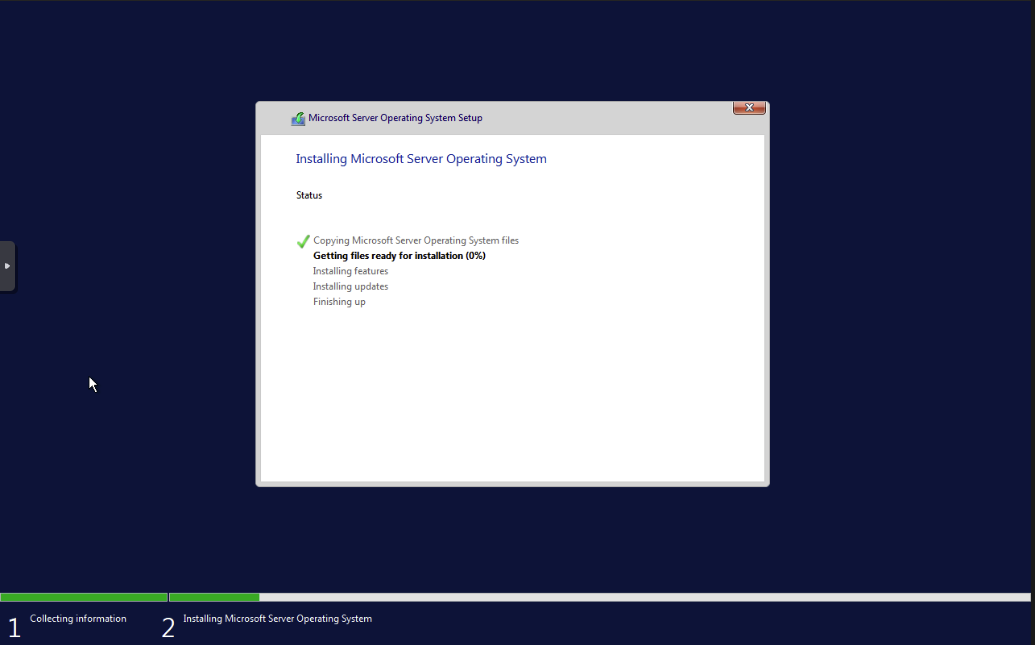
Sit back and take a break. Let this finish.
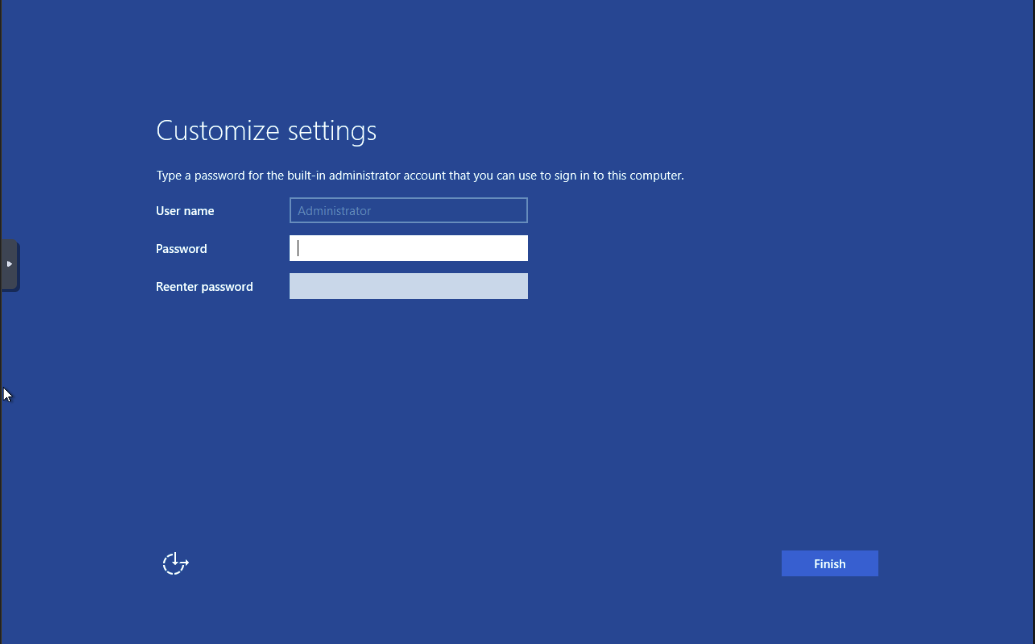
Create a password for the administrator account.
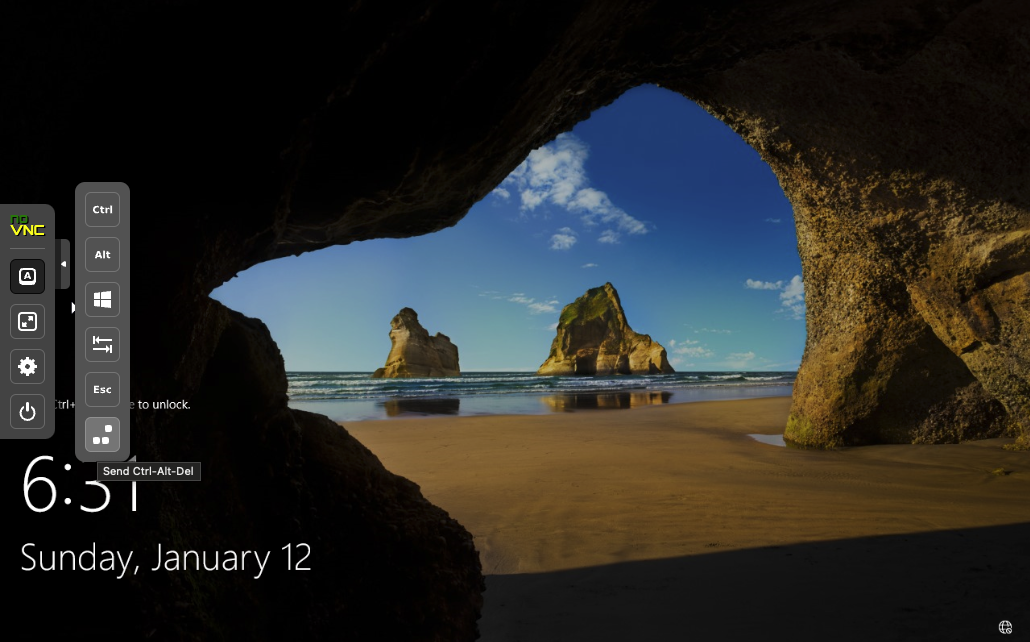
On the VM you should see an arrow. Click on it and it will bring up a menu. You want to select the box with the three squares.This will simulate Ctrl + Alt + Del. Afterwards enter your password.
Windows Server Configuration
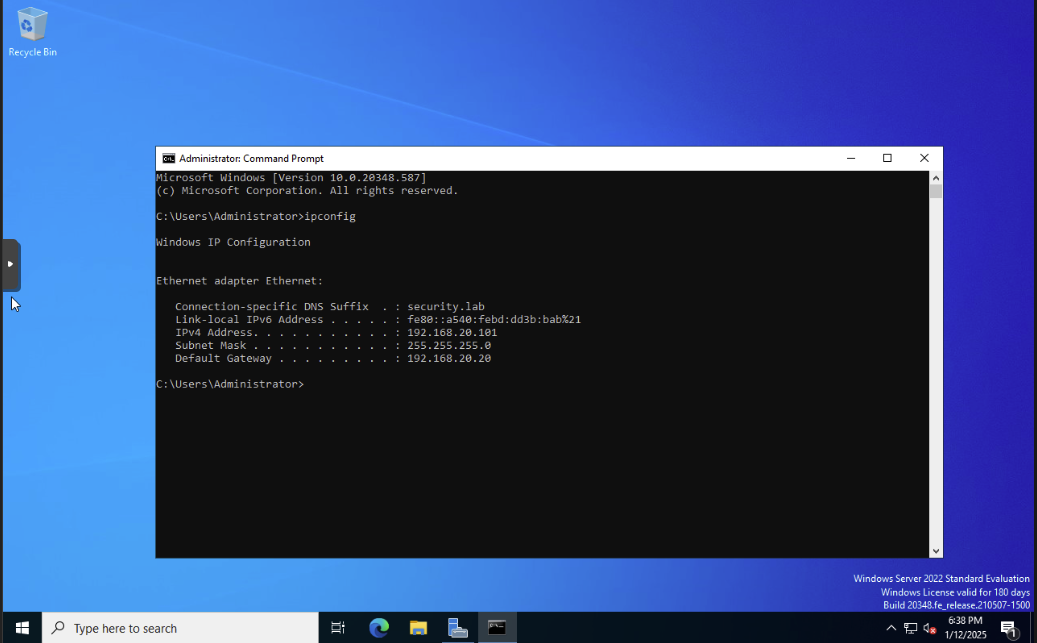
Once inside, let’s open CMD and type ipconfig. We should verify that we recieved an ip from our DHCP server to which we did.
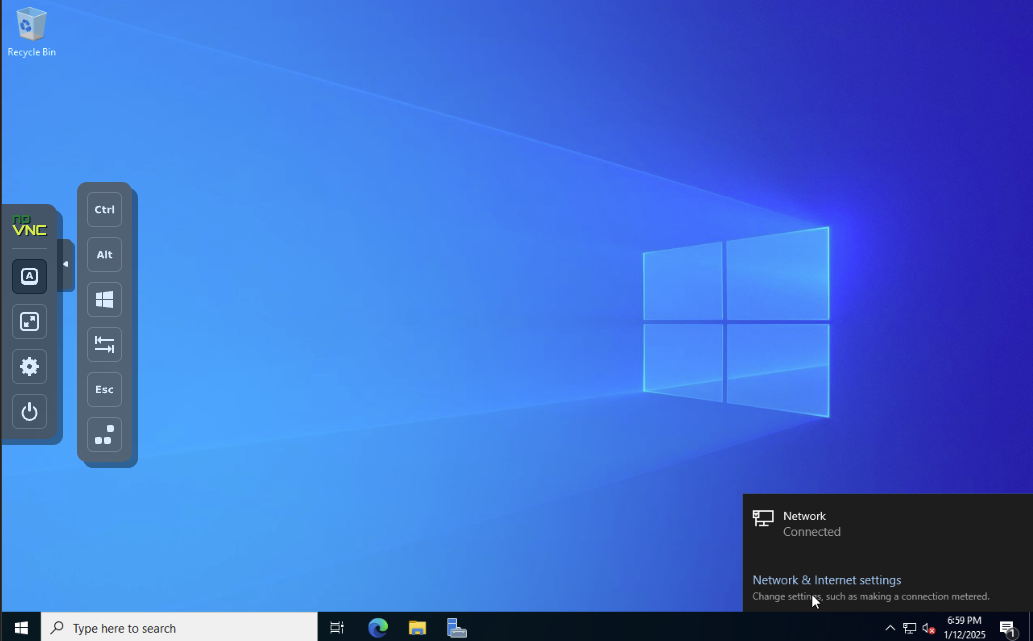
Click on Network and Internet Settings.
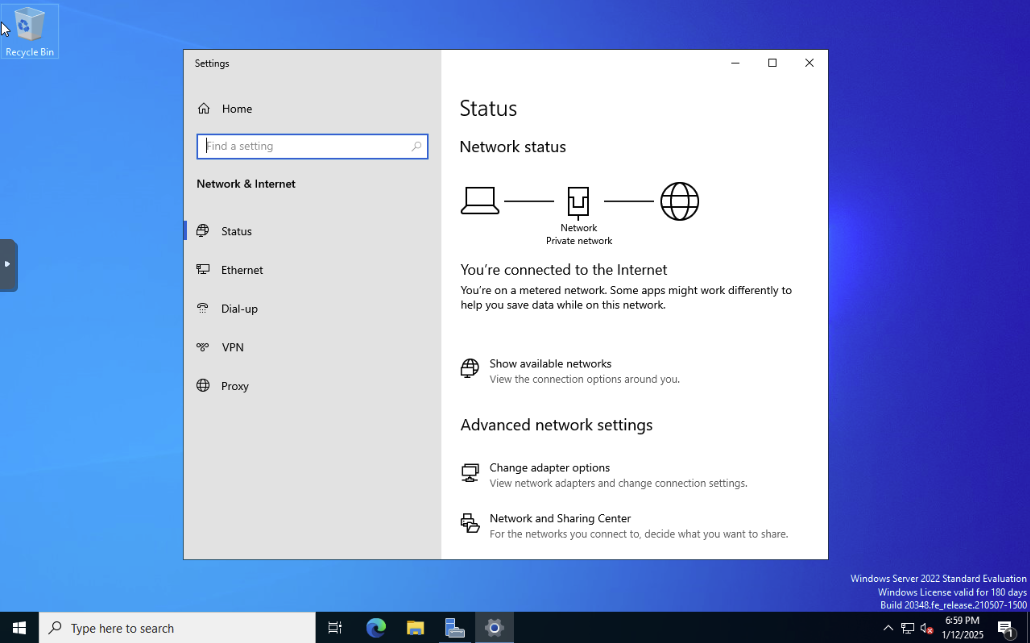
Click Change Adapter Options.
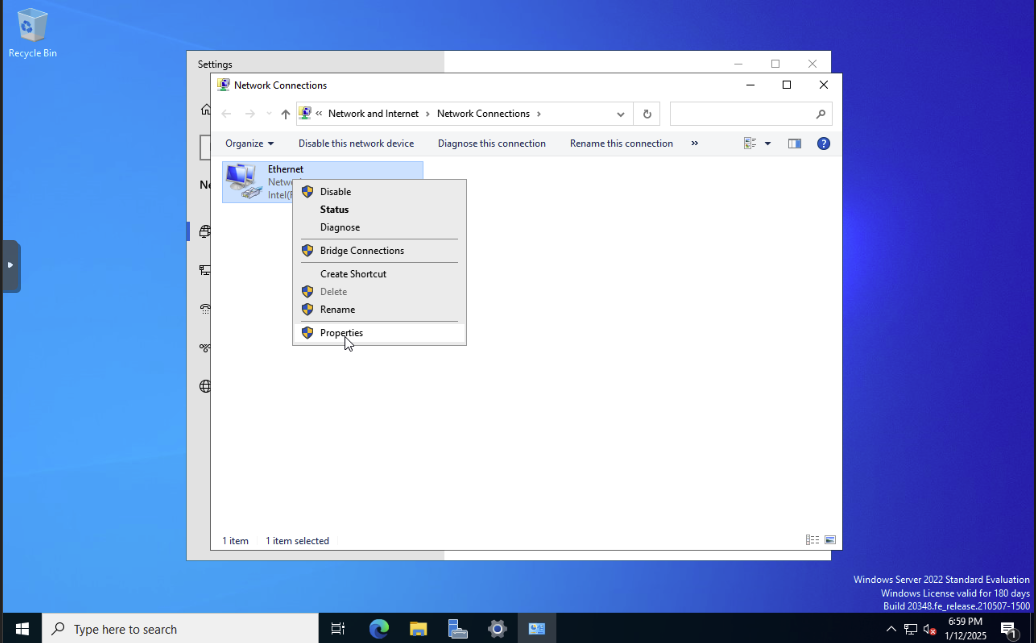
Right Click Ethernet and Click Properties.
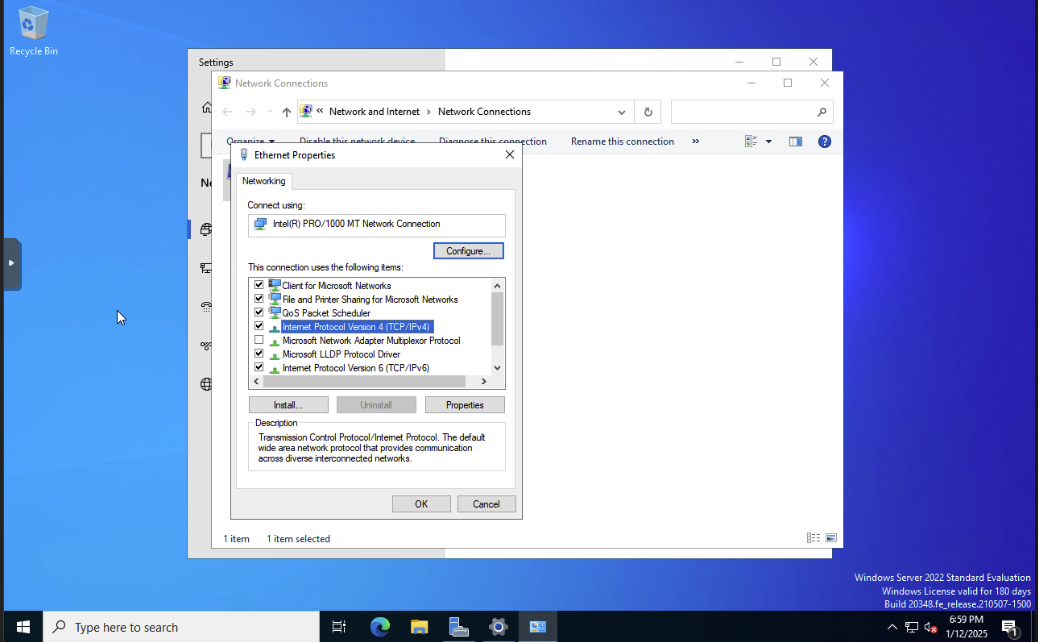
Select Internet Protocol Version 4 (TCP/IPv4) and Click Properties.
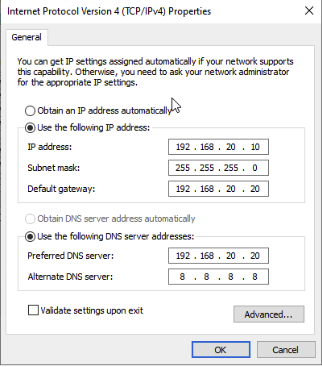
Enter the details as shown and then click Ok.
IP address: 192.168.20.10
Subnet Mask: 255.255.255.0
Default gateway: 192.168.20.20
Preferrred DNS Server: 192.168.20.20
Alternate DNS Server: 8.8.8.8
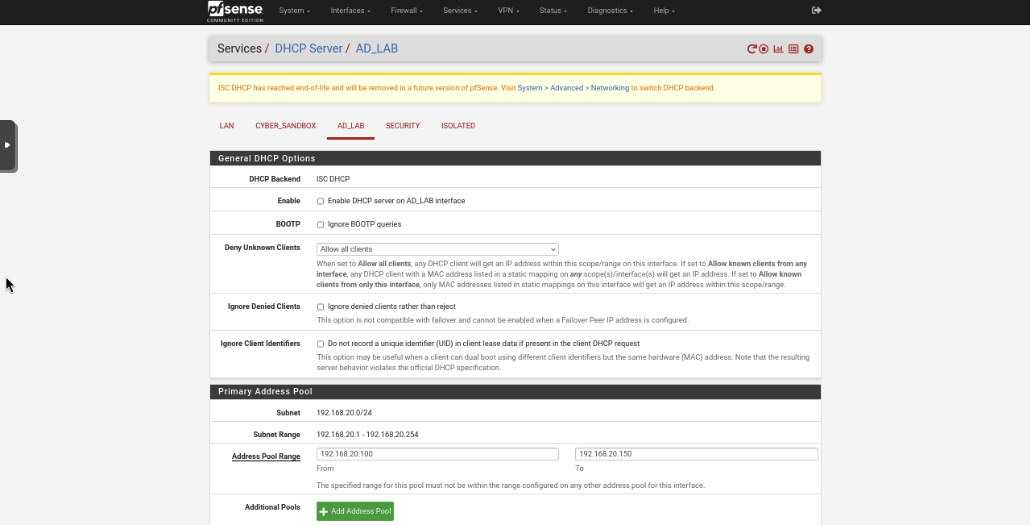
Now that our DC has a static IP. We will turn off the DHCP Server on pfSense through our kali VM. The DC will be made into a DHCP server so before we start the DHCP. We will disable the pfSense DHCP. Navigate to Servers -> DHCP Server -> AD_LAB and uncheck the Enable box.
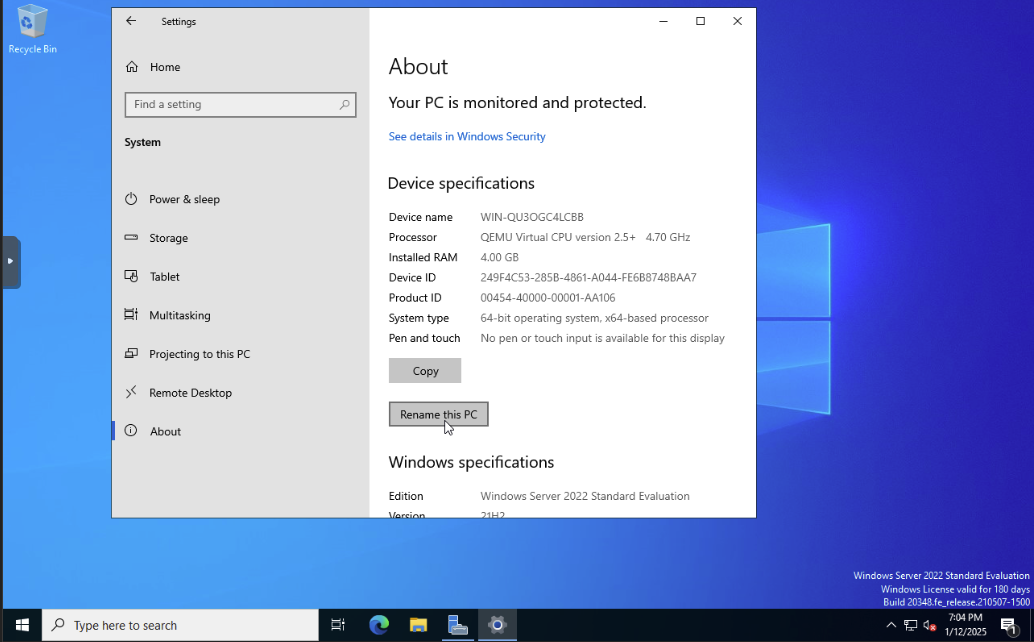
Let’s rename our PC to something else. Head over to About This PC -> Rename this PC
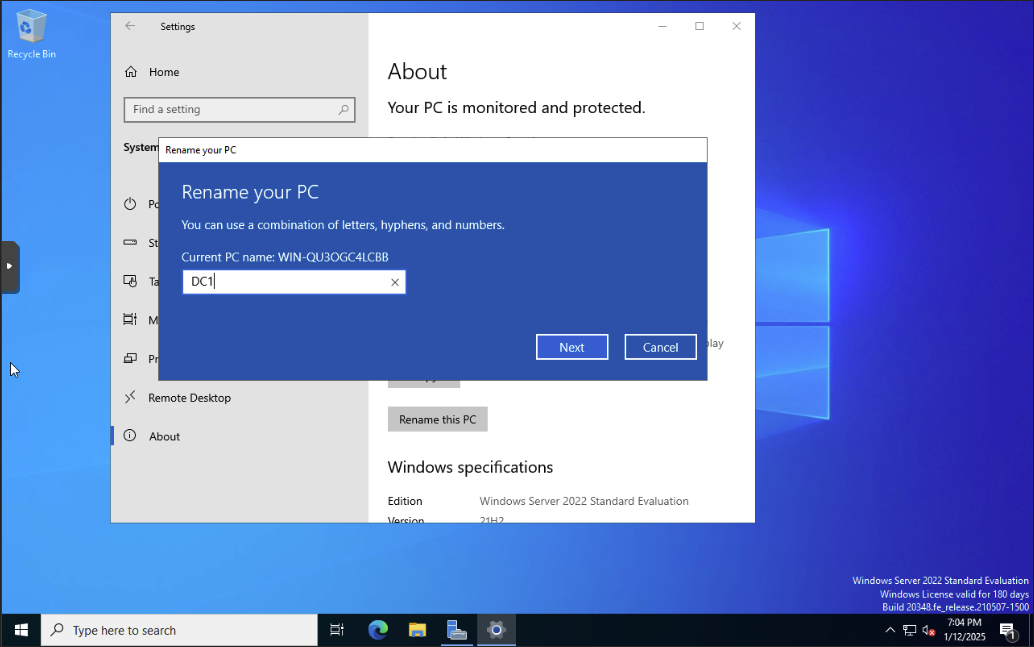
We will rename to DC1.
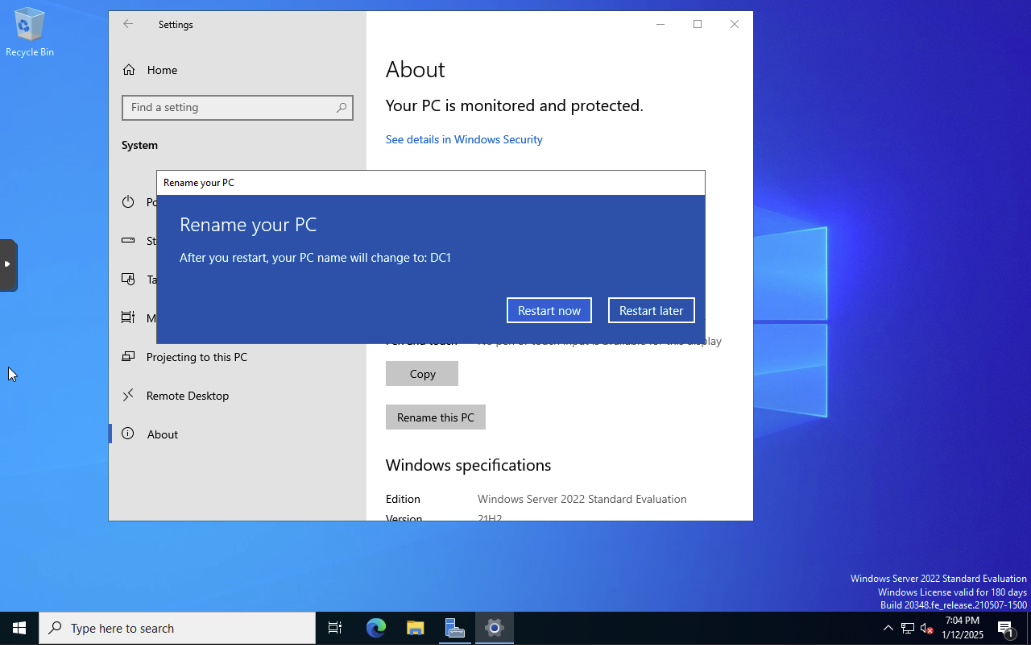
Click Restart.
Active Directory and Domain Controller Configuration
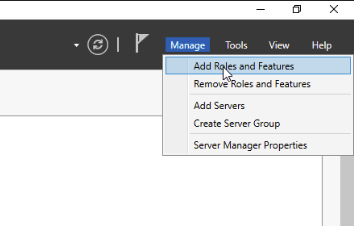
On the Server Manager Window, click Manage and select Add Roles and Features.
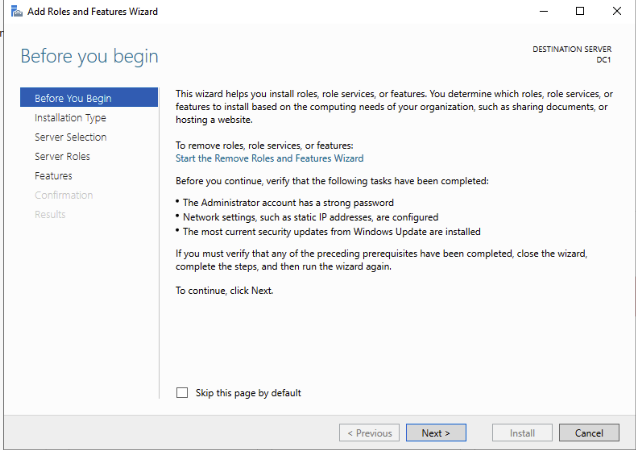
Click Next until you reach Server Roles.
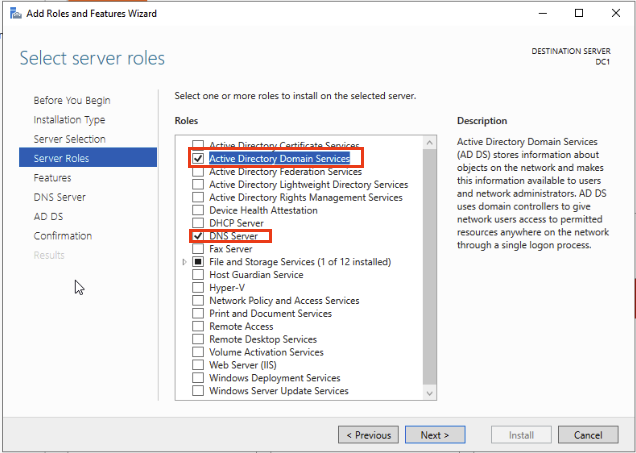
Select Active Directory Domain Services and DNS Server. Click Next.
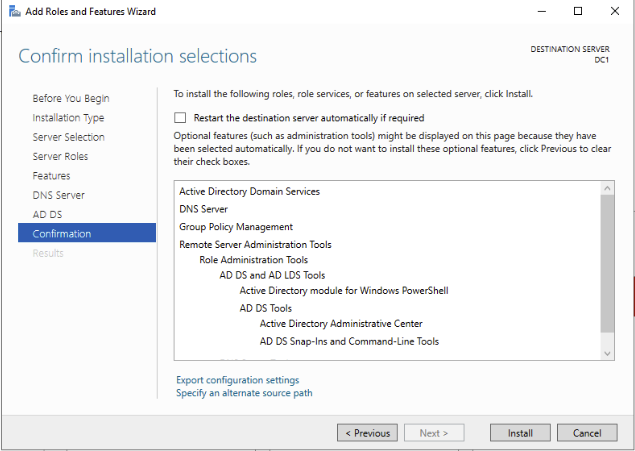
Click Add Features until you reach the Confirmation page and click Install.
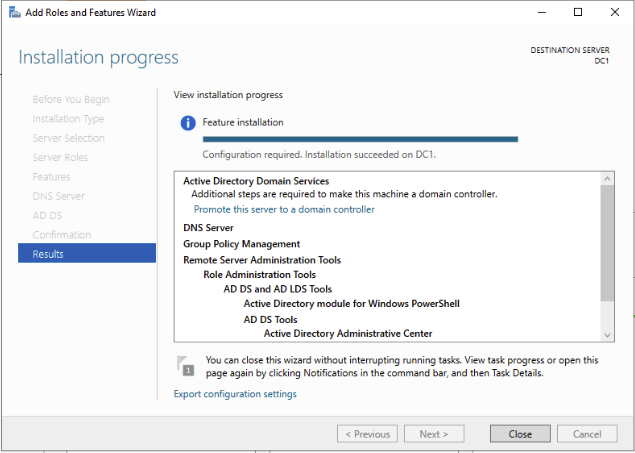
Let it finish and then Click Close.
Domain Controller Configuration
Let’s head back to the server manager and select Promote this server to a domain controller. 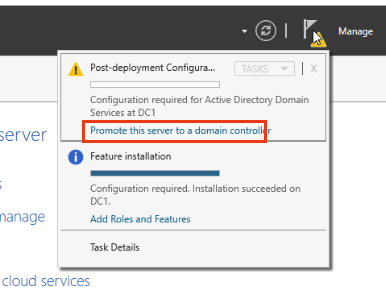
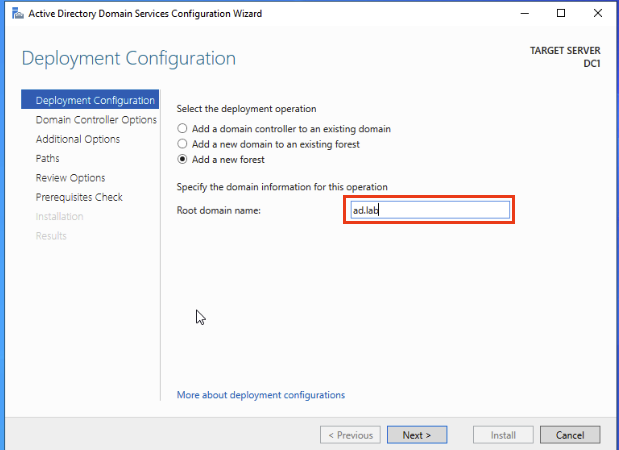
A Configuration wizard should open up. Select Add a new forest and we will name the root domain ad.lab. If you choose to name is something different make sure it is two words separated by a period. click Next.
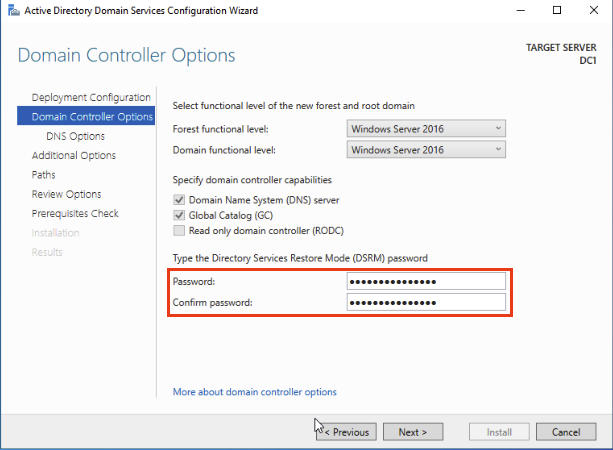
Set a password for the DSRM and click Next.
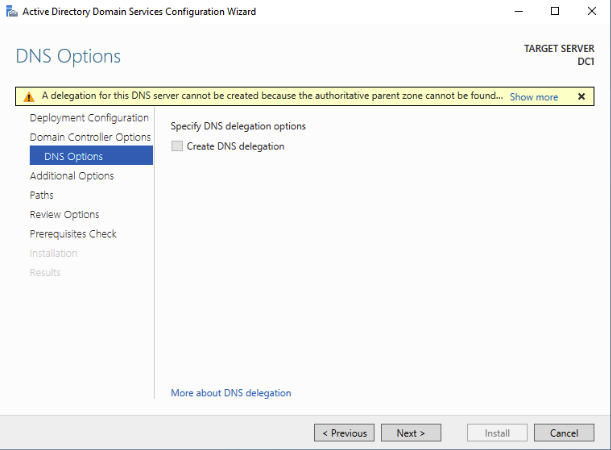
Nothing to do here. click Next.
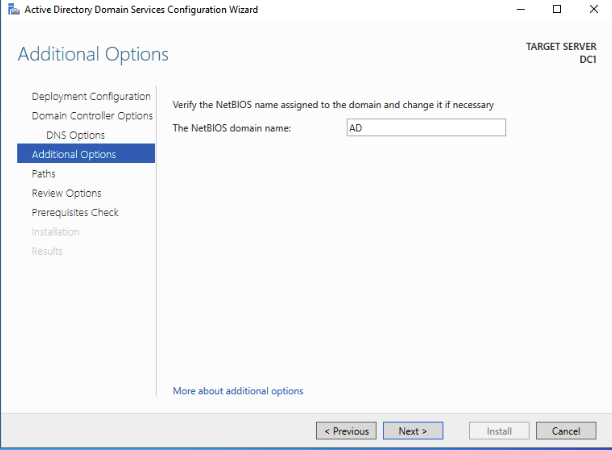
The NetBIOS domain name should already be filled out for you. Click Next.

Spam click Next until you hit this page and click Install. It will prompt you to install after it finishes. You should also notice the name on the login page has changed. The domain is not attached before the username and means we have successfully set up the domain controller.
DHCP Installation
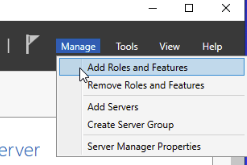
Head on back to the server manager. Click Manage -> Add Roles and Features.
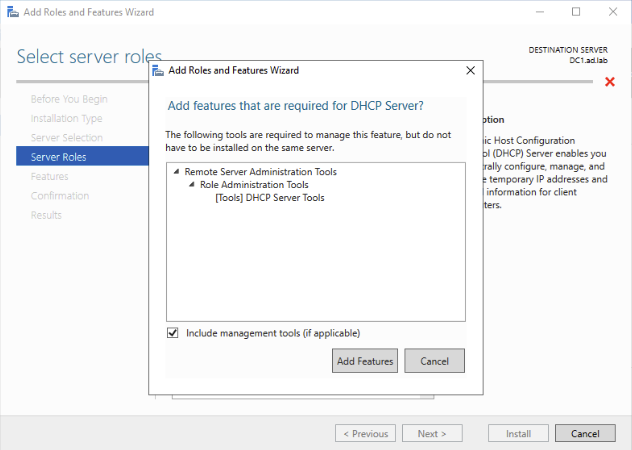
Click Next until you get to server roles. Select DHCP Server and then click Add Features.
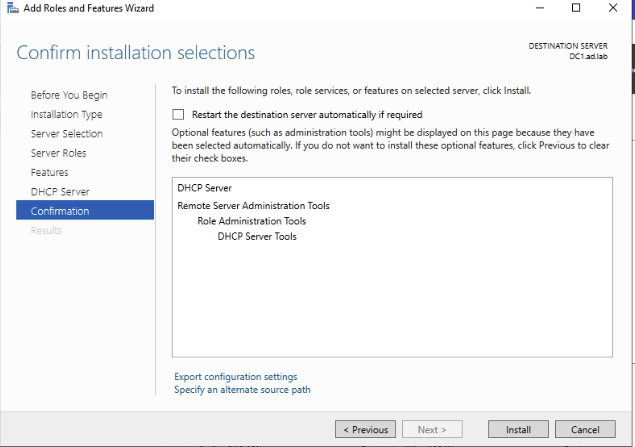
Click Next until you get to the confirmation and click Install.
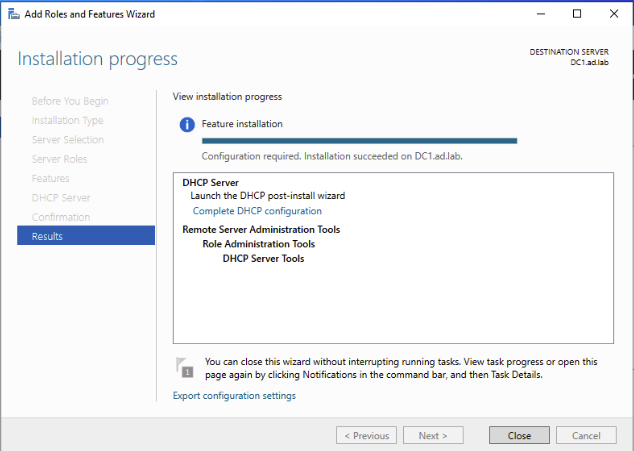
Let it do its thing. Then hit Close
DHCP Configuration
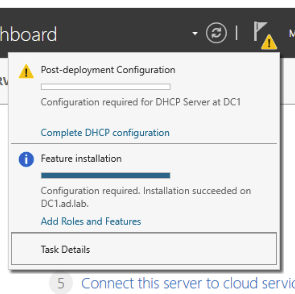
Once it has finishing installing. Head back over to the server manager and click the Flag and Complete DHCP Configurations.
Clicking it should bring up a DHCP configuration wizard.
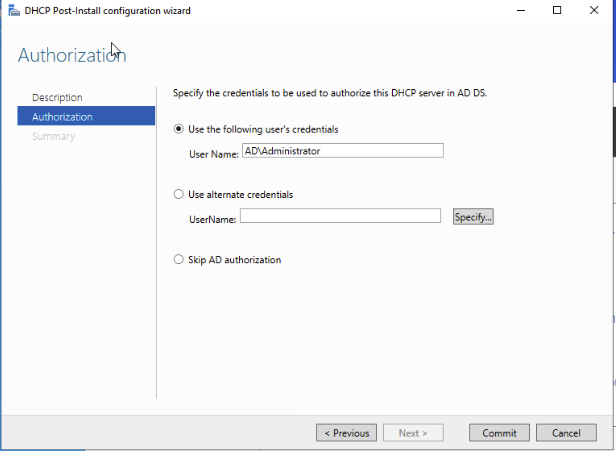
Leave everything as default. Click Commit.
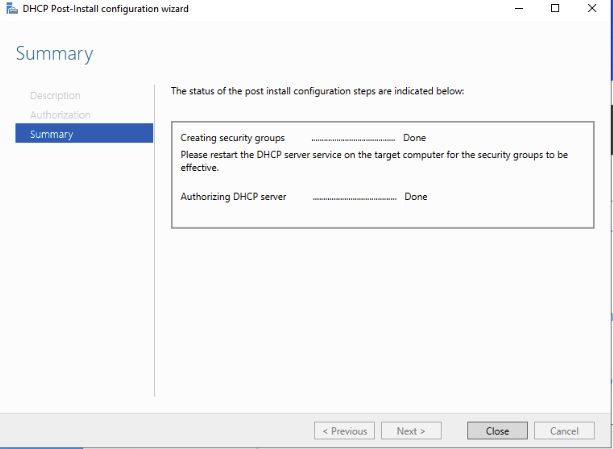
Click Close.
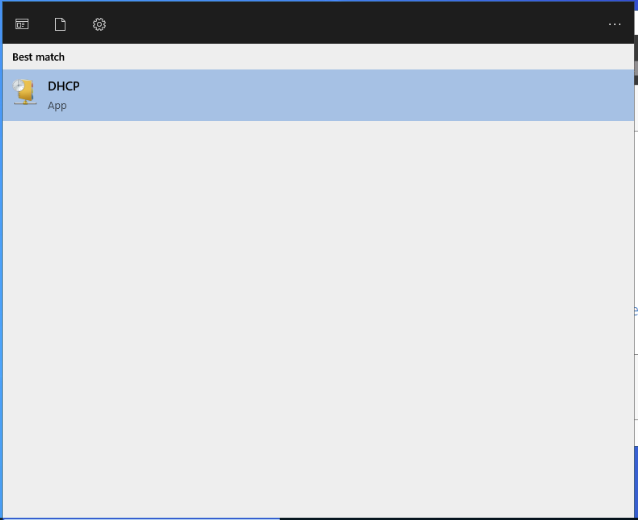
Click Start and type in DHCP and open it up.
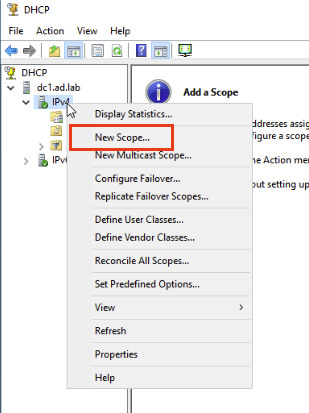
Navigate to the sidebar and select IPv4 under dc1.ad.lab. Right Click and select New Scope.
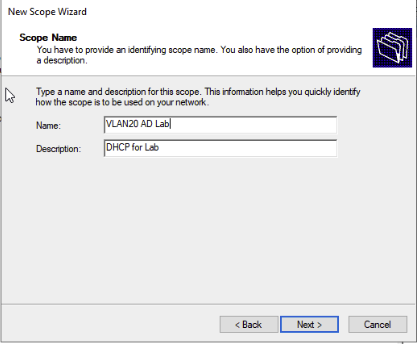
Name the scope VLAN 20 AD Lab and the description will be DHCP for Lab.
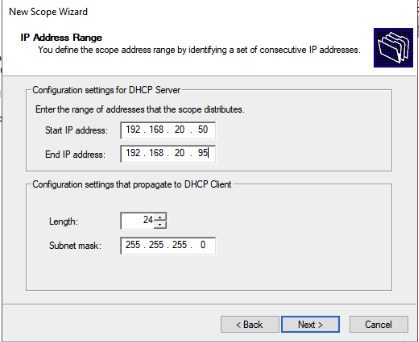
Assign the following values:
Start IP Address: 192.168.20.50
End IP Address: 192.168.20.95
Length: 24
Subnet Mask: 255.255.255.0
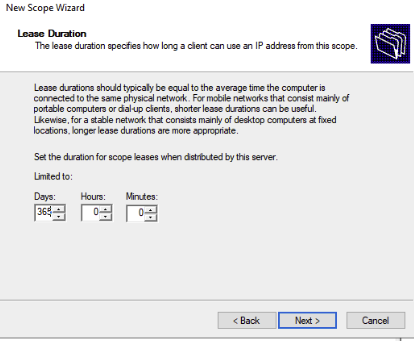
Change the Days to 365.
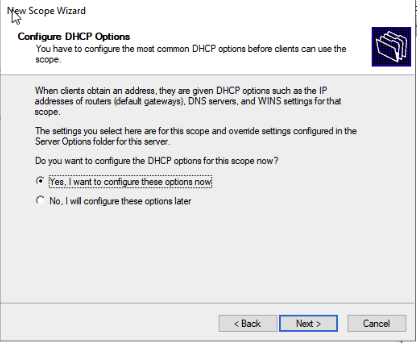
Leave it at Yes. Click Next.
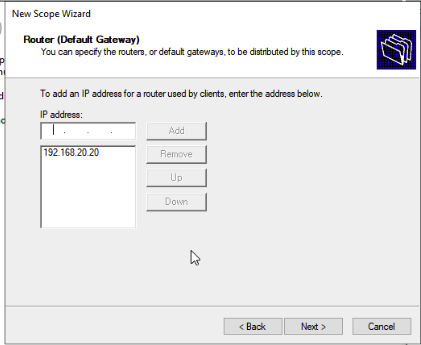
Enter 192.168.20.20 and click Add. Hit Next
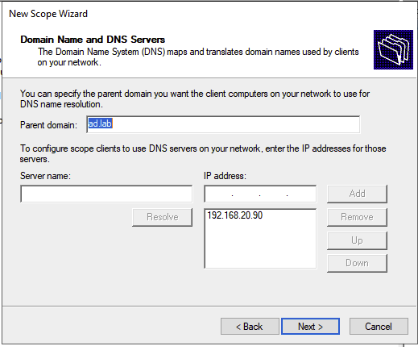
Nothing to change here. Click Next.
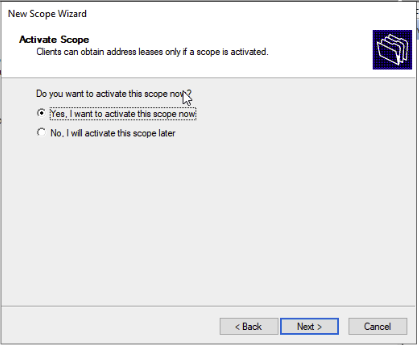
Leave it as Yes. Hit Next.
And… Thats it for the first part! We have basically finished setting up our Windows Server 2022. We set up the Domain Controller, DHCP, and Active Directory. Next up is to create the Windows 10 VMs which will act as our users in the Domain Controller and Active Directory. Stay tuned for the second part of the AD Lab Segment!