Home Network Upgrade Journey
Join me as I transform my basic home network into a high-speed powerhouse—with a few expensive upgrades and tips along the way.
 Banner Backgroud by vectorcorp
Welcome back! I apologize for disappearing on everyone. I had some major things happen in my life—including the loss of my cat and a host of other issues—but most of those have been resolved. It’s good to be back.
This post deviates from my routine home lab series because I performed a massive upgrade to my home network, which consumed a lot of my time in addition to the grieving process. Before diving back into my home lab series, I wanted to showcase my new, shiny upgrades and the skills I’ve learned.

Here’s a diagram of my upgraded network! I will go more in-depth about each section later in this blog.
Previous Network Hardware
Before diving into my new network, I want to establish a baseline by describing what my old setup looked like so we can compare it to the new one. I currently pay for 1 GB speeds from Frontier, usually topping out around 600–800 Mbps on a good day. I was using the router provided by Frontier—the Eero Pro 6e—paired with a simple TP-Link 8-port switch. It’s a great router for the everyday consumer, and I got decent reception upstairs with a WiFi extender. However, as a power user, I wanted to move away from a flat network and adopt a more advanced setup.
Main Grieverences with the Eero:
- No performance metrics or any type of readings
- No separate SSIDs or VLAN Support
- Performance was just ok
- Paid tier for enchanced security?
- Amazon Privacy concerns
After weeks of extensive research, I finally decided on a replacement. For my firewall, I chose OPNsense due to its highly configurable nature. Although it has a steep learning curve, I embraced it wholeheartedly—and it’s been great so far!
Once I settled on a firewall, I needed to find the hardware to host it. I also felt the need to upgrade my network switch since the old one was a basic unmanaged 1 GB switch. Lastly, I decided to move away from having WiFi built into routers and opted for an independent Access Point (AP) that I would mount on my ceiling for optimal coverage.
Firewall Upgrade
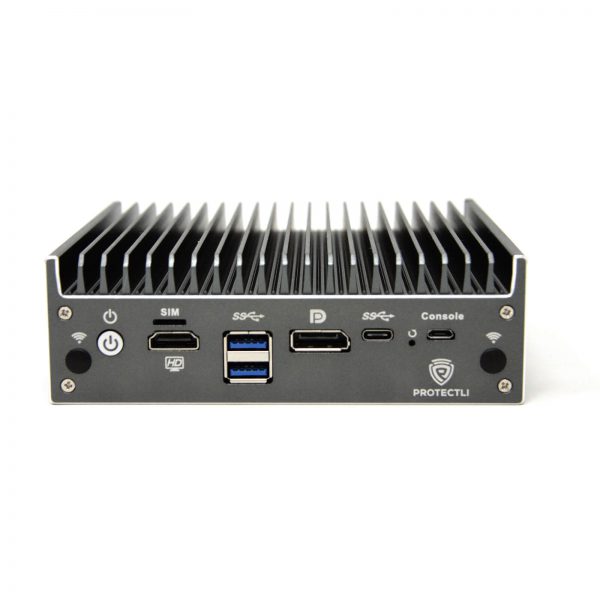
After extensive research, I opted to purchase the Protectli VP2420 to house OPNsense. I have to say, the build quality of the VP2420 is amazing—it feels premium with its dark gray, powder-coated texture. The fanless design makes it silent, although it does get a bit toasty to the touch, but that’s nothing to worry about.
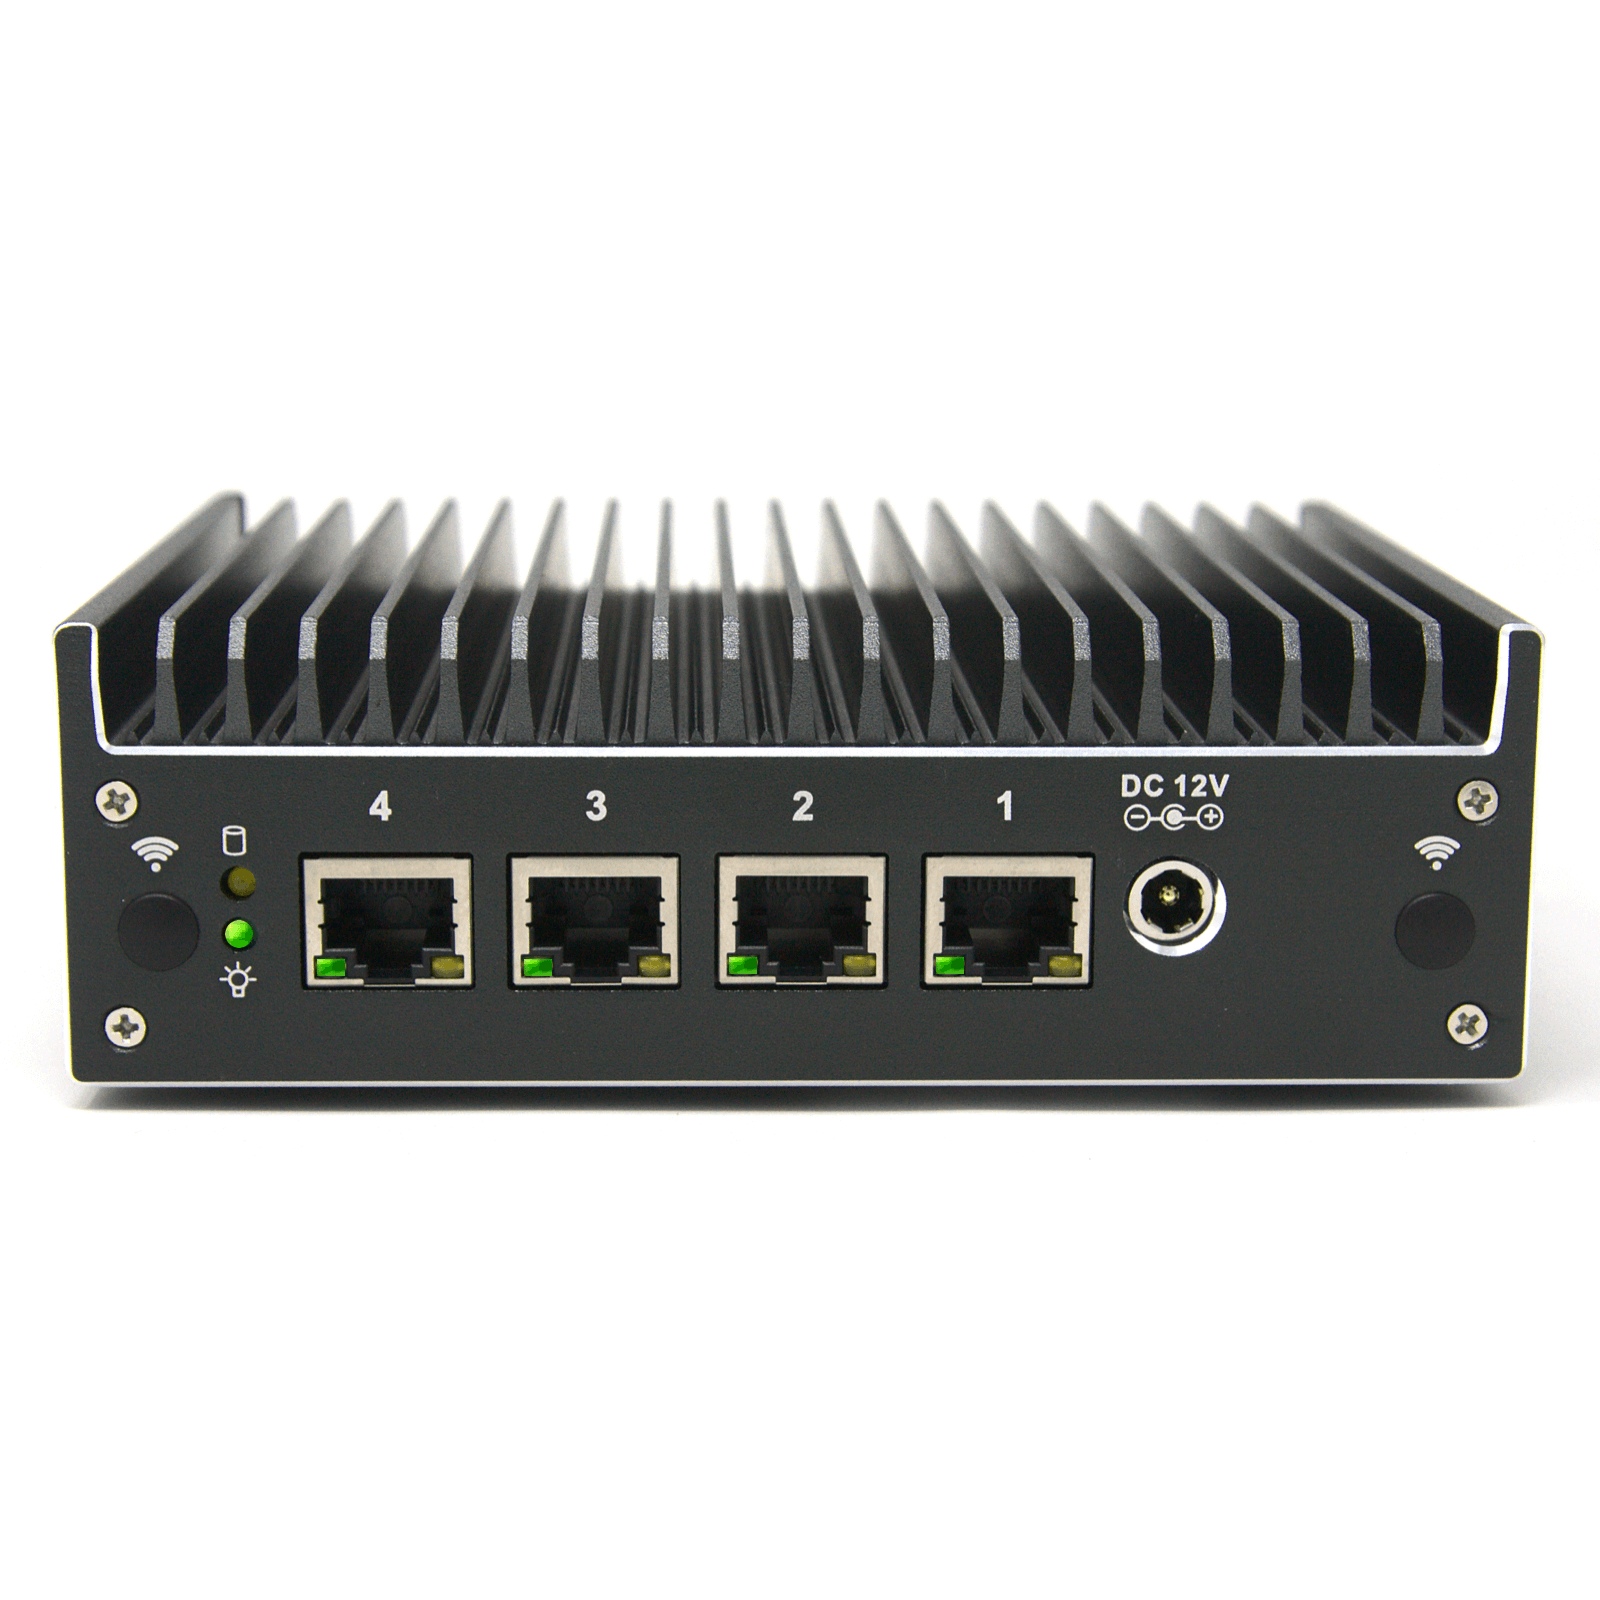
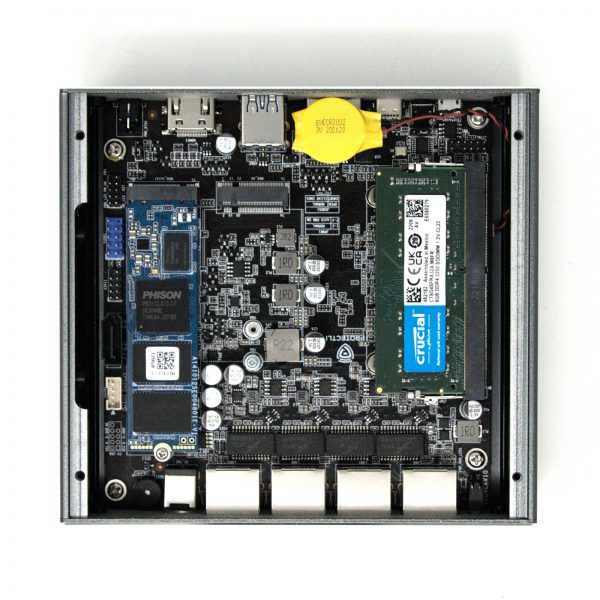
When you open it up, you can see it has upgradeable RAM and storage. I chose the barebones model that came with no memory or storage and purchased a single DIMM of Crucial 16 GB RAM and a 1 TB M.2 SSD off Amazon. While Protectli does offer the option to add RAM and storage, I found it more cost-effective to buy them separately. Below are the hardware specifications for anyone interested:
- Intel® Celeron® J6412 Quad Core at 2 GHz (Burst up to 2.6 GHz)
- 4 Intel® 2.5 Gigabit Ethernet NIC ports
- M.2 SATA SSD Slot (Note: This device does not support NVMe drives)
- 16 GB eMMC module on board
- Intel® AES-NI support
- Fanless and Silent
-Included 12v Power Supply, VESA mount kit, Serial Console Cable, SATA data and power cables for internal SSD, Quick Start Guide
Managed Switch Upgrade
After a couple of hours of research, I quickly settled on the UniFi Lite 16-Port PoE Switch by Ubiquiti. What really sold me was its user interface and performance. UniFi consistently ranks high for home network setups. Although it’s a bit expensive, it was worth the price for a premium product.
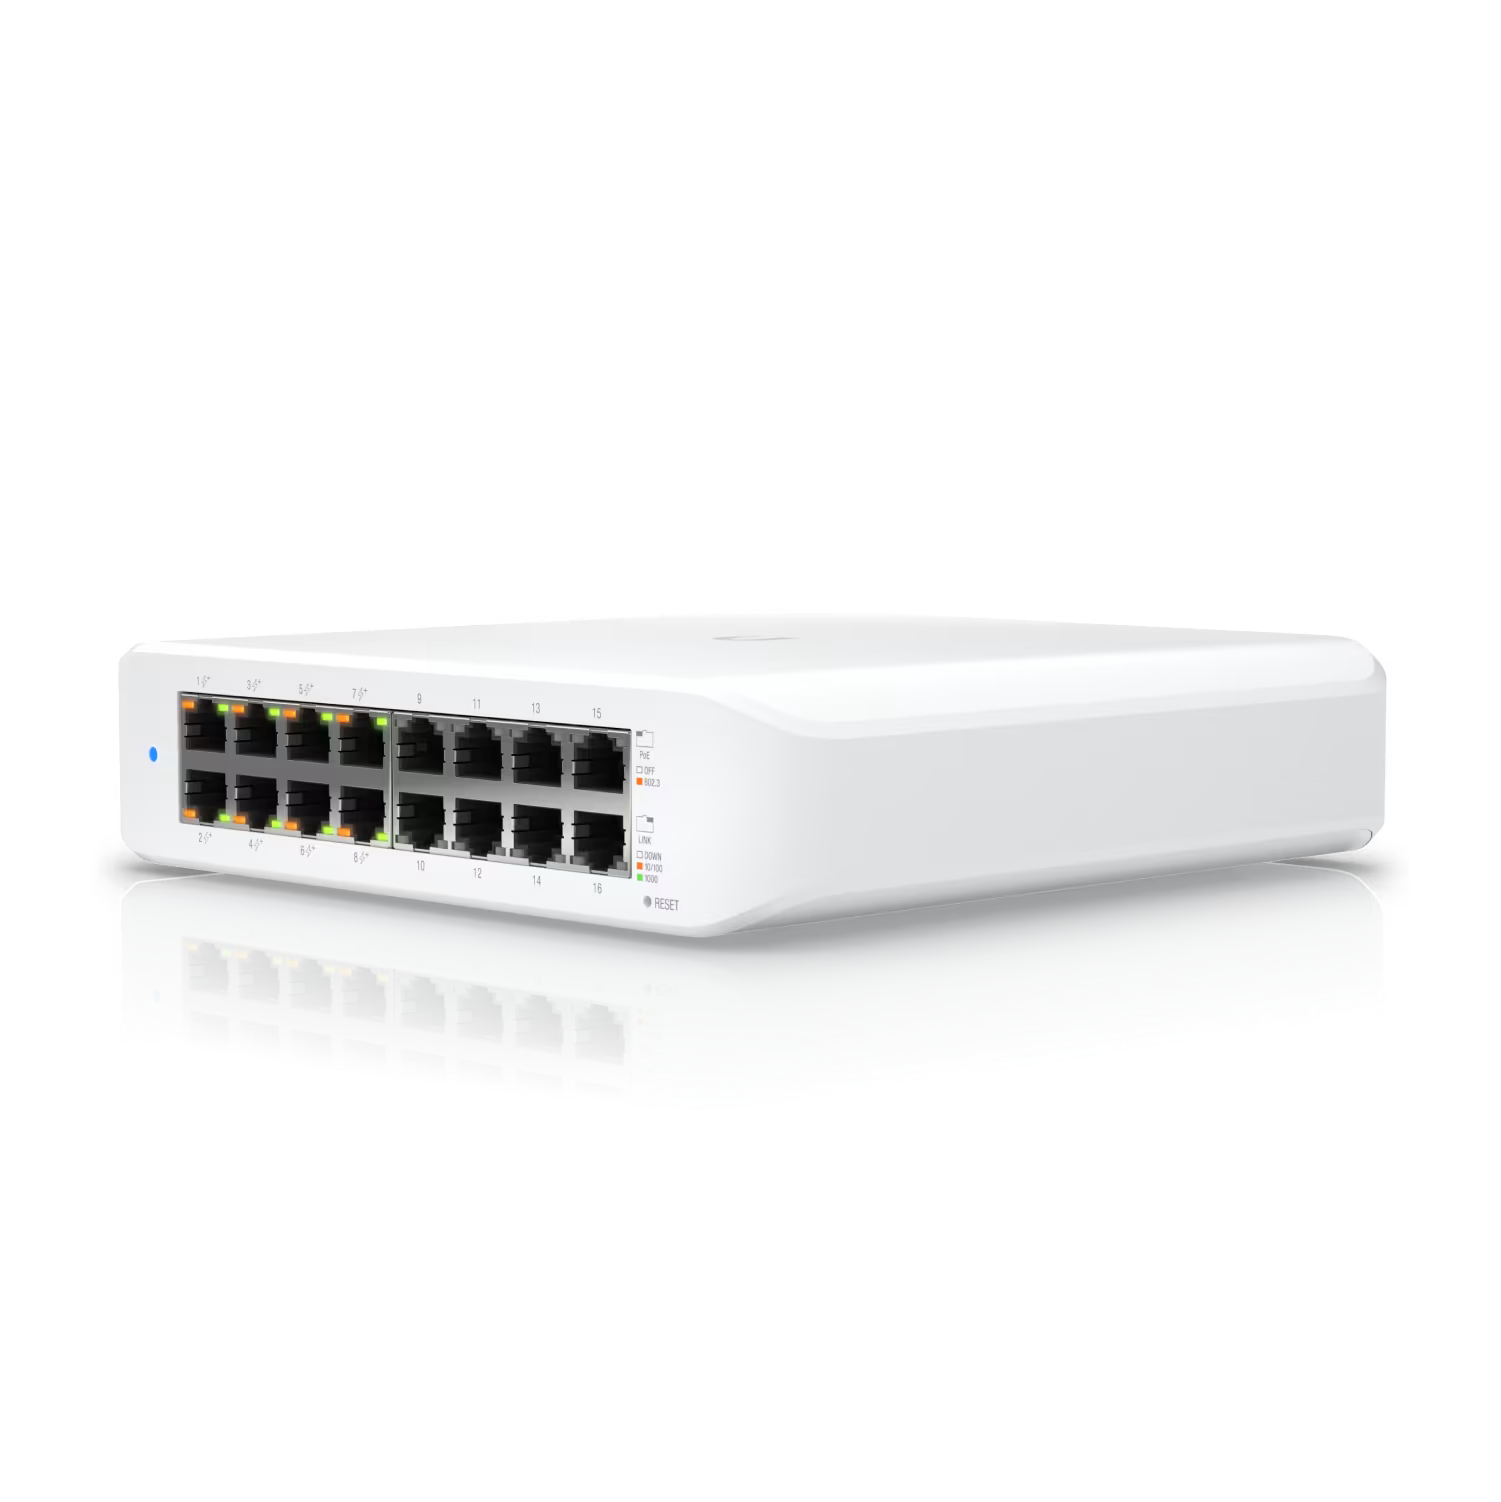
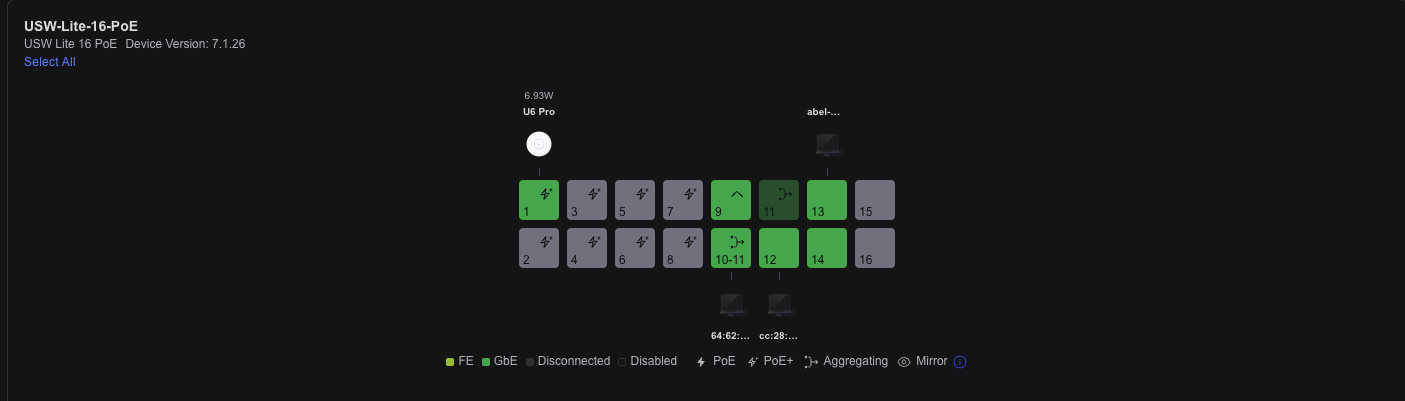
The main features I was looking for when I found this switch was PoE for Access Point, Port Management and VLAN Support. The unifi switch met all the demands and more! The UI is capable and easy to navigate.
Note: If you choose to run a unifi switch with a 3rd party gateway. You will need to self-host the unifi controller somewhere in your network. I did it on my home lab server by spinning up an Ubuntu VM.
WiFi AP Upgrade
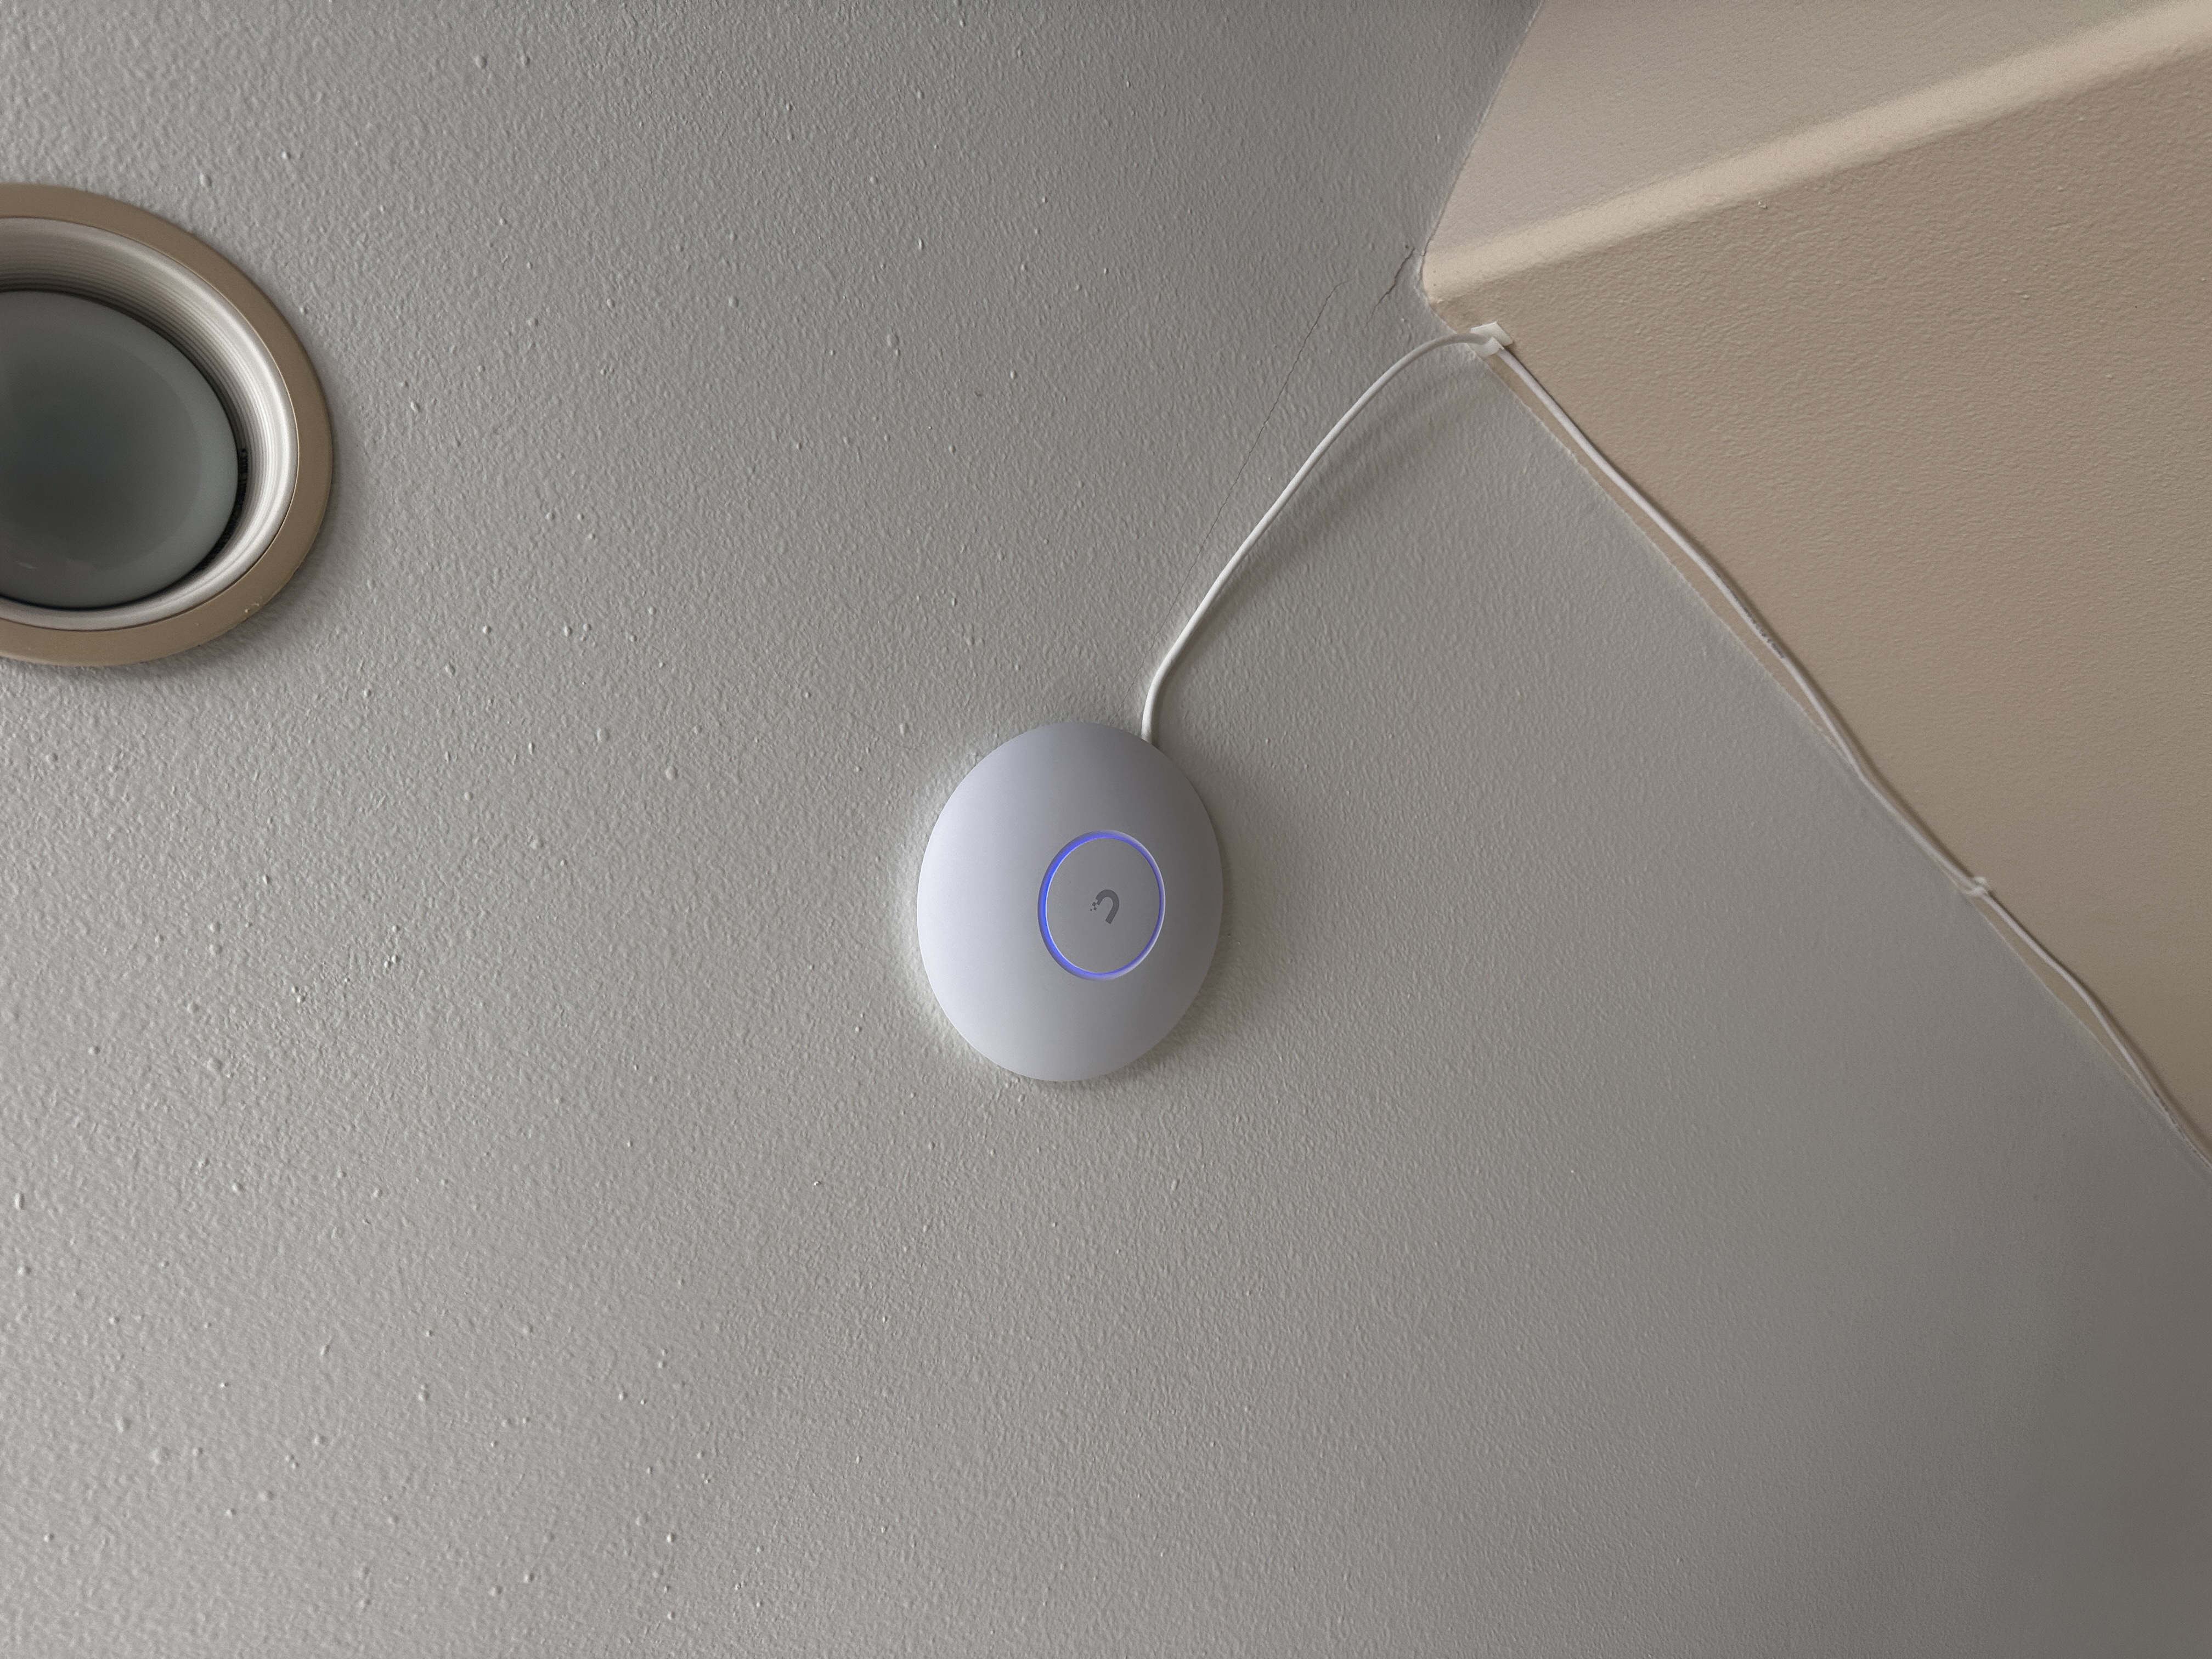
After extensive research and reading countless Reddit posts, I decided to upgrade my wireless network with the UniFi U6 Pro Access Point. This AP supports WiFi 6, which enhances speeds and provides a more stable connection than the Eero.
Why I chose the Unifi U6 Pro
- WiFi 6: I will take faster data rates, reduced latency and better handling of multiple evices simultaneously any day of the week. This is significant upgrade from my old setup.
- Integration: Since I had already bought a Unifi Switch, integrating the U6 Pro with the Unifi Controller was seamless and the controller makes it easy to monitor performance and troubleshoot problems.
- Coverage: The U6 Pro provides wider and consistent coverage throughout my house. This was important to me, previously I would be averaging 1-2 bars of service in my office.
Installation and Setup
Setting up the Unifi U6 Pro was straightforward:
Mounting: I mounted the AP on the ceiling to maximize coverage and minimize obstructions. However, I couldn’t drill into my walls, so I used 3M Command Strips. So far, they’ve held up well, though I wouldn’t recommend this method for long-term use. I only tried it because I have thick carpet, and if the AP were to fall, it wouldn’t shatter.
Configuration: Setting up the Unifi Controller wasn’t too hard of a task. I found a docker compose file by jacobalberty. I popped this into Dockge and quickly spun up the Unifi Controller instance. Initial Configuration was a breeze. I quickly configured all the SSIDs and applied VLANs without a sweat!
Scalability:
Unifi APs are amazing at creating a mesh network. If/When I move into a bigger house I will be purchashing more Unifi APs around the house for the mesh network. Something to consider if you want room for future expansion.
Network Diagram & VLAN Configuration
Returning to the network diagram at the beginning of this post, it provides a bird’s-eye view of my new home network. Here, I break down the different VLANs and briefly discuss the devices assigned to each VLAN, as well as my firewall and Pi-hole DNS server.
Note: The diagram also shows virtualized VMs and Docker instances, which I won’t cover in this post since it focuses mainly on the network.)
VLAN Breakdown
- VLAN 1 (LAN): Managment: Self explanatory. This is where the network management devices live. My homelab server, DNS server, Network switch etc.
- VLAN 10 (HOME): This is where devices that are trusted and secure live. This can range from laptops, Game Consoles, Tablets, etc. Basically all the devices that aren’t IoT live here.
- VLAN 20 (IoT): Smart home devices that potentially be less secure. This can range from Thermostats, Smart plugs, Alexa, etc. I don’t need need these devices snooping on traffic from my other devices lol.
- VLAN 30 (GUEST): Isolated Access for guests. Even if I trust the person I do not trust their devices. This VLANS provides any guest access to my internet and Ad blocking capabilities thanks to my pihole. This ensures any malicious entities do not enter my main network.
- VLAN 40 (DMZ): Last but not least, the DMZ. This VLAN is for any devices that I expose out to the internet through a port. This can range from a plex server, minecraft server, web server, etc. For me, I only have a minecraft server hosted on ubuntu VM that is currently on this VLAN.
Firewall Configuration
Setting up the firewall rules for each VLAN was a bit tricky at first understanding OPNSense’s UI but after some research it was a breeze. I set up base rules on each VLAN as shown below.
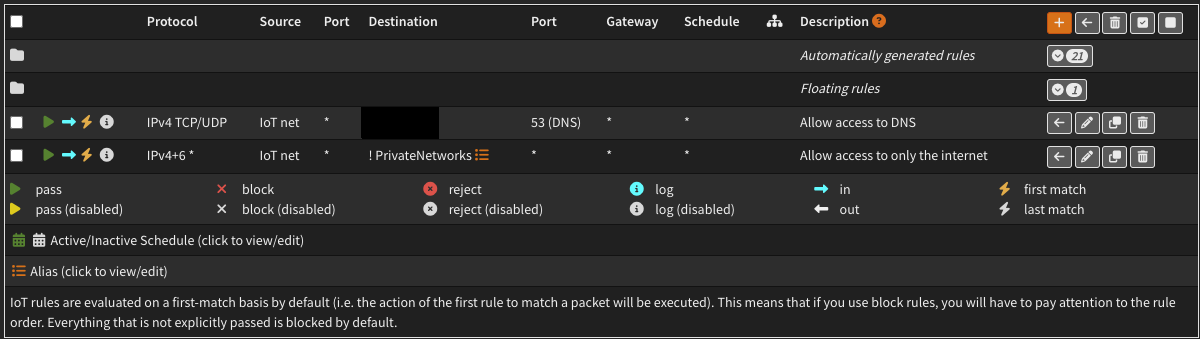
These basic rules allow for all private networks to access the internet and allow access to my DNS server which is the pihole’s IP Address. I have exceptions rules that allow VLANS to communicate with a device in another vlan. For example, I have a minecraft server in the DMZ VLAN that I want to be accessible to the HOME and GUEST VLAN. I made a firewall rules to allow any device on the HOME and GUEST VLAN to access the IP of the server on port 25565. As I am slowly building up my home network I will add exceptions when needed. Another one coming soon might be a plex server!
Pi-Hole Integration
I have my pihole running on a raspberry pi and have it set as my primary DNS server and DNS Sinkhole. This acts as a network wide ad blocker improving my broswer speeds and reducing exposure to those malicious and pesky ads on the internet. This works all across my VLANs because I have to share the love. I configured on my firewall to route all DNS queries from Unbound to the pi-hole. The pi-hole UI is interactive and shows me in real time the DNS queries that were allowed and blocked. It also brings into percepstive how many api calls the IoT devices execute on a daily basis. Below is screenshot and you can see what I mean.
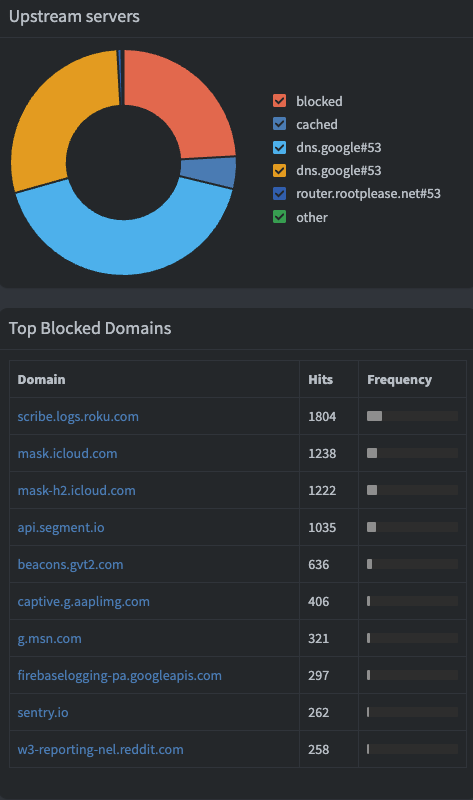
Easily, the Pi-hole is one of my best upgrades to my home network. The reduced ad blocking on the network is just amazing, I would highly recommend everyone do this as a project. It helped me get hands on learning with networking,solidified my knowledge about DNS and I learned how to set up a Dynamic DNS using cloudflare and docker.
Summary
Thank you for sticking to the end! I hope you enjoyed my comprehensive home network upgrade journey! I began by setting a baseline to my old setup with the Eero Pro 6e with a basic TP-Link switch–then comparing it to the new robust configuration. Upgrades included installing OPNSense on barebone metal Protectli VP2420, integrating a mananged Unifi Lite 16 Port PoE switch, and deploying out a Unifi U6 Pro. I also briefly detailed how I segmented my network using VLANs, assigning what devices to what VLAN, and the configured firewall rules for each VLAN. Not to mention, the integration of a Pi-hole for networking wide adblocking. Together all these upgrades created a secure,effiicent and scalable infrastructure for both my current and future needs.
Keep an eye out for the last parts of my Home Lab series!